New to water filtration? Our guide will tell you everything you need to know, from our water treatment experts.
Remember when there were only a handful of water filters to choose from, and they pretty much removed the same five contaminants?
We’ve come a long way since then. Nowadays, there are all types of filters that can do all sorts of things, and the difference between filtered and unfiltered water is bigger than ever. Unsurprisingly, choosing a water filter has become almost as complicated as choosing a new car.
If you’re feeling overwhelmed, your mind will become much clearer when you understand the different types of water filters available, how they work, where they’re installed, and what they remove.
This guide should provide the education you’re looking for.
Table of Contents
🚰 Types of Water Filters
If improving your water quality is your goal, your choice of water filters is far from limited. These days, there are tons of impressive water filters on the market – and they’ve all got their standout features. In fact, there’s something of a family tree of water filters, as you’ll soon discover.
Let’s jump into a list of the most common types of water filters you’re likely to come across for filtering water at home. Which filter type sounds best to you?
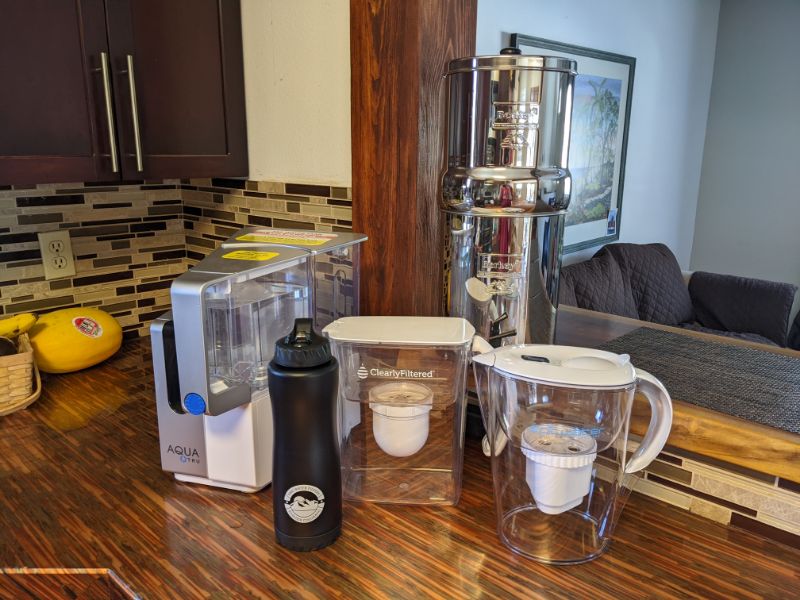
Countertop Water Filters
You can probably guess what countertop filters are: they’re filters that sit on your countertop.
What makes these filters special? Well, you’ve got a few options to choose from, to start with:
Gravity
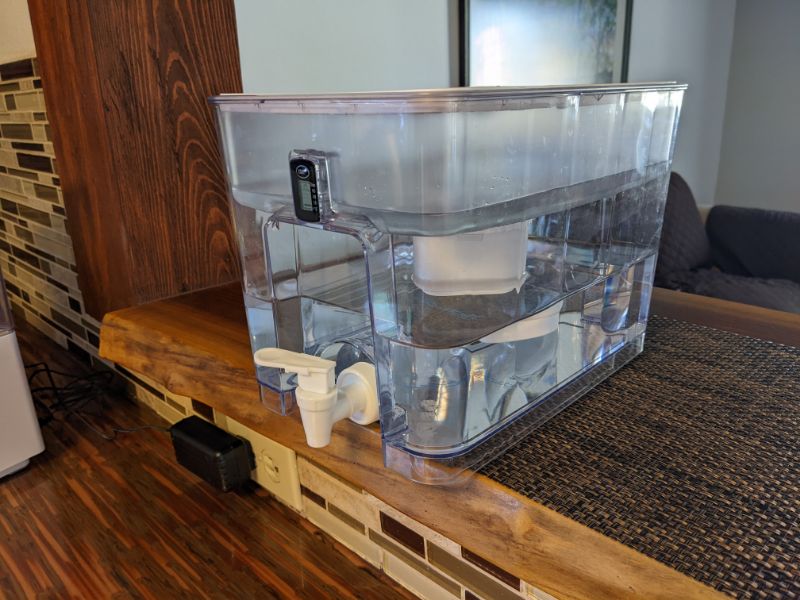
Gravity countertop filters are the easiest-to-setup on-counter filters – you just assemble the unit, add the filter, and you’re ready to go.
Most gravity countertop filters consist of two tanks, one sitting on top of the other. For water to pass from the top tank into the bottom, it must first pass through a filter. With the help of gravity, unfiltered water from the top chamber becomes filtered water in the bottom chamber.
Gravity countertop water filters cost $100-$300 upfront, depending on their size and materials, and cost $30-$140 per year.
Countertop Faucet
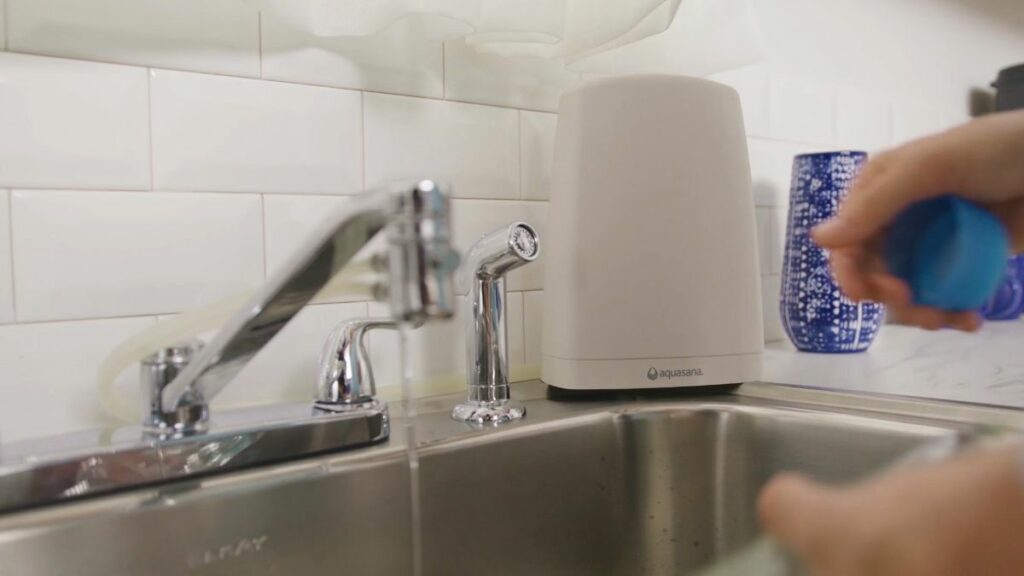
Countertop faucet filters sit near your kitchen sink and connect to your faucet via a flexible tube. There are two types of countertop faucet filters:
- Countertop dispensers – These filters dispense water directly from their units. You lift a lever or press a button to send water from your faucet, through the filter, and out of a spout on the unit.
- Countertop diversion filters – These filters divert water from your faucet, then return it to your faucet for drinking. When you turn on your faucet, the water will flow through the filter, then back to the faucet, and out of the spout.
Countertop faucet filters are the most affordable countertop filters, costing between $80 and $200 upfront, and around $100 per year.
Countertop RO
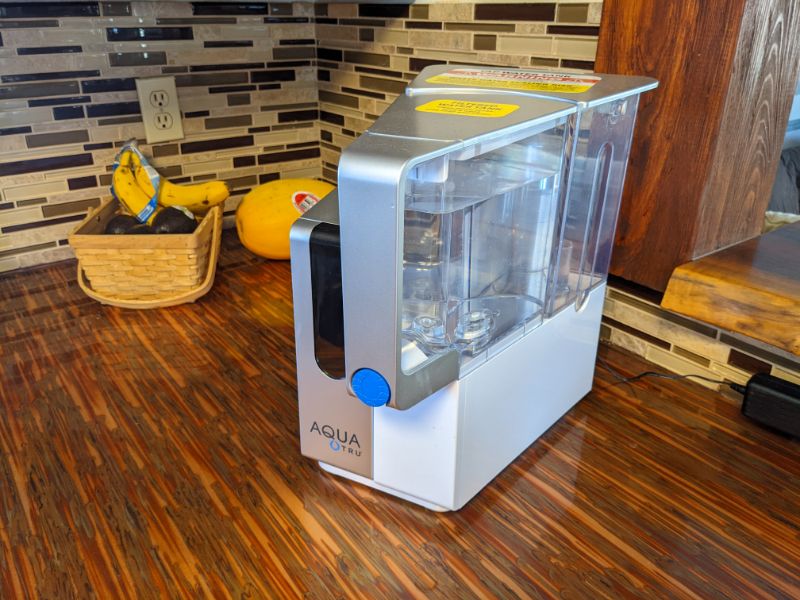
Countertop reverse osmosis filters are standalone filtration systems that use reverse osmosis to filter water.
Let’s quickly look at how countertop reverse osmosis systems work:
- Connect the system up to a power outlet and switch it on.
- Add a batch of tap water to a dedicated chamber within the system.
- Press a button on the unit to begin the reverse osmosis process.
- The system will use electricity to generate the force required, usually via a small pump, to send water through several filter stages, including a sediment filter, a carbon filter, and a reverse osmosis membrane.
- Push a button or lift a lever to dispense filtered water from the system.
- Remove the wastewater from the wastewater chamber.
Because of their capable performance, countertop RO filters are more expensive than other countertop filtration techniques. The average cost of a countertop reverse osmosis filter is $300-$500 upfront, with a yearly operating cost of around $100.
Distillers
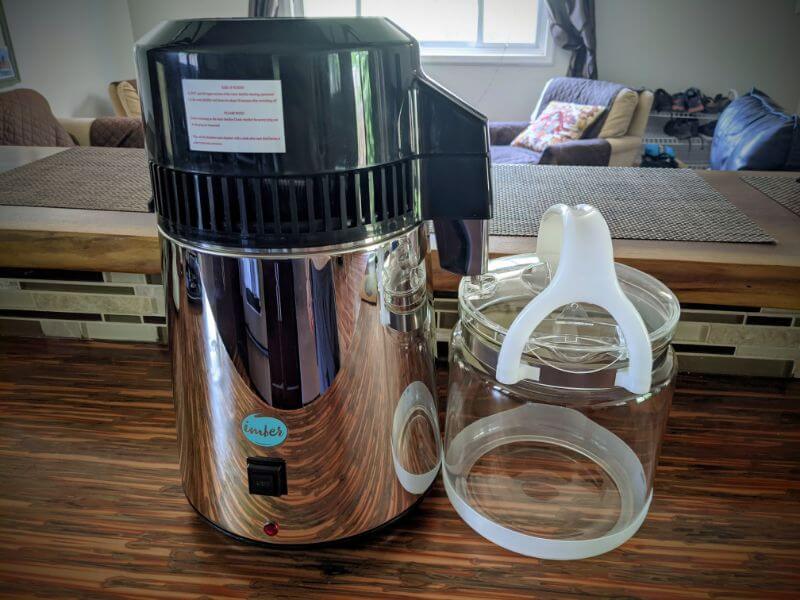
Distillers are countertop units that purify water, essentially eliminating all of its contaminants.
Remember distillation from your school science class? No? Here’s a quick reminder of the process, as it relates to water filtration:
- Add water to the boiling chamber, connect the distiller to a power outlet, and switch the machine on.
- The water will boil inside the chamber until it evaporates into steam.
- Steam rises and travels down a cooling corridor, where it condenses back into liquid form.
- The condensed water passes through a final activated carbon polishing filter before dripping into a clean container.
How does distillation purify water? Simply because most contaminants are unable to evaporate and condense at the same temperatures as water, so they’re left behind in the boiling chamber. Any contaminants that do have similar boiling and cooling points as water are removed by the activated carbon filter.
Water distillers cost $150-$400 upfront and have an annual spend of $40-$100 (for carbon filter replacements and electricity use).
Faucet Mounted Systems
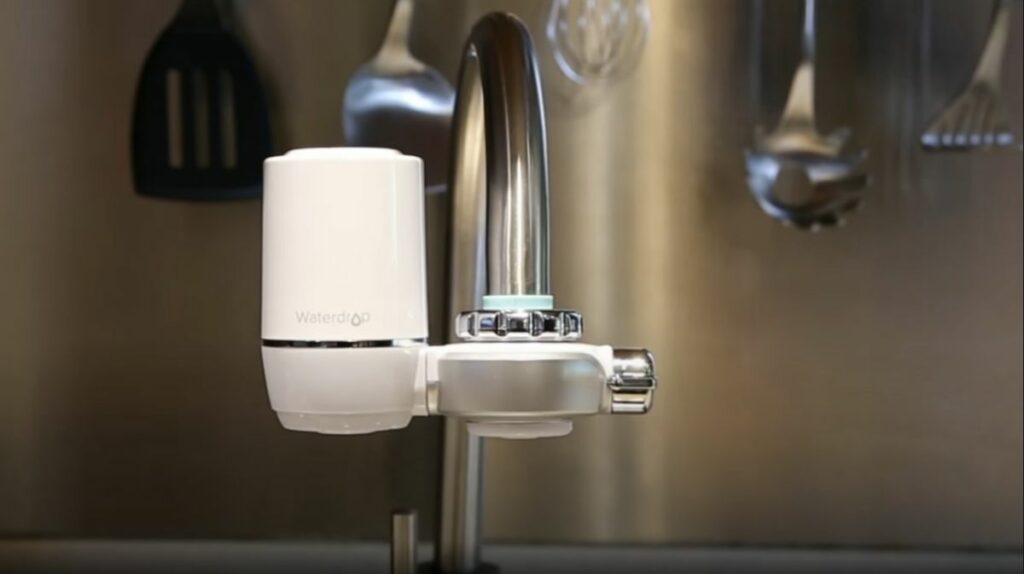
Faucet mounted systems are types of filters that attach directly onto your faucet. A faucet mounted filter typically uses a granular activated carbon cartridge to remove aesthetic contaminants from water.
Let’s look at how a faucet mounted system works:
- Attach the unit to the end of your faucet following the manufacturer’s instructions.
- Turn on your faucet. This will send water through the faucet filter, where it will be filtered prior to dispensing.
It really is that simple. Just make sure to only use the filter with cold water, because hot water can damage the granular activated carbon media. Most faucet filters will let you switch between filtered and unfiltered water to prevent hot water damage and to preserve the filter, only using it when it’s needed.
Faucet filters aren’t only one of the easiest filter types to use – they’re also one of the most affordable. You can buy a solid faucet mounted filter like the PUR Plus system for $50-$80, and the annual running cost is $50-$100.
Pitcher Filters
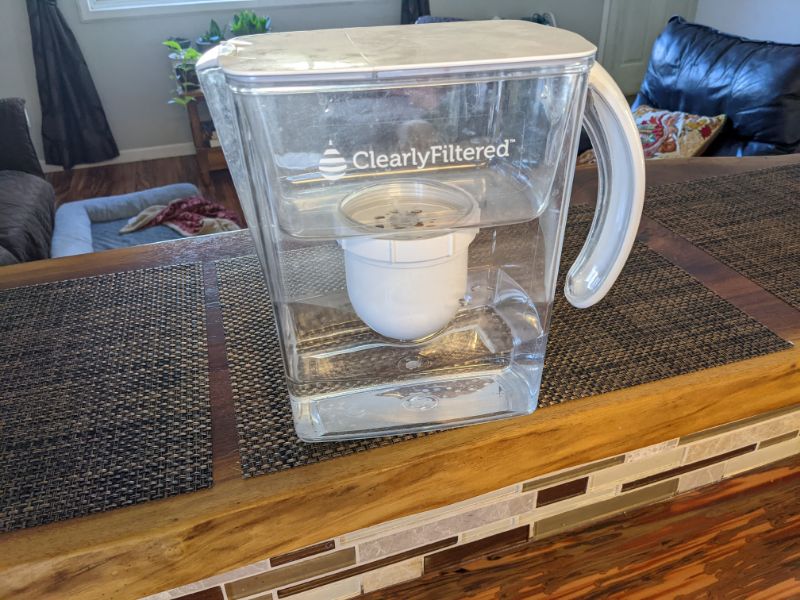
Pitcher filters look like standard pitcher jugs, but with a notable additional feature: a filter.
Here’s how a pitcher water filter works:
- Fill the top compartment of the jug with water.
- The water will travel through the filter and into the bottom chamber.
- When you tilt the pitcher, filtered water will leave the spout.
Pitcher water filters don’t need to be connected to your waterline or power supply, which makes them a good option for emergency preparedness. Even if there’s a power outage and your water supply has been contaminated, you can use a pitcher filter to make sure your water is safe to drink.
Don’t assume that pitcher filters can only remove a handful of contaminants, either – some of these filters, such as the Clearly Filtered pitcher, provide very thorough water purification, removing hundreds of contaminants from drinking water.
Pitcher filters are another affordable water filter type. You can buy a pitcher filter for as little as $40-$60, with an annual maintenance spend of $80-$150.
Read More: Water filter pitcher vs faucet filter: which is better?
Refrigerator Filters
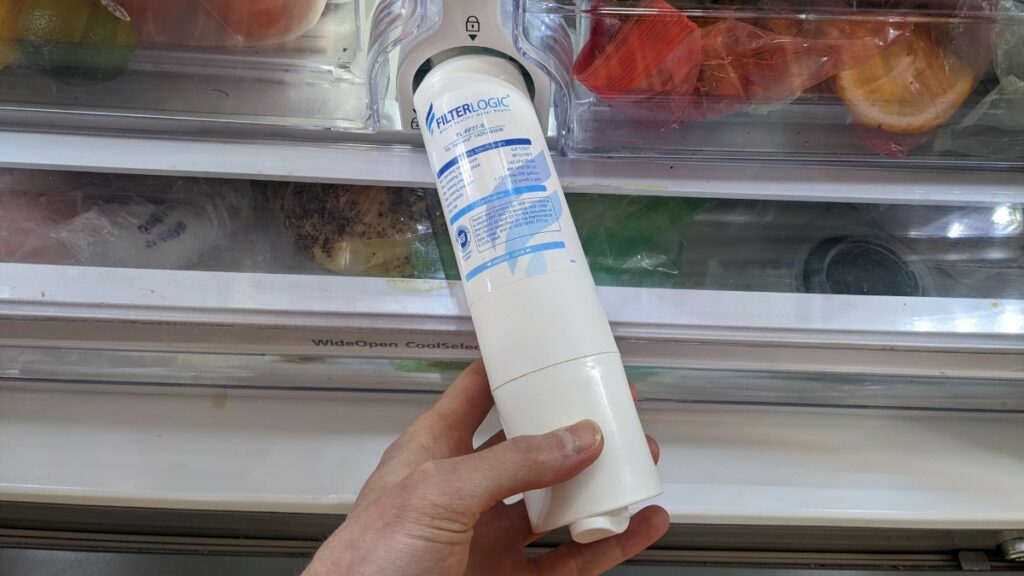
Refrigerator filters are specially designed for refrigerators with water or ice dispensers.
There are two types of refrigerator filters:
- Built-in refrigerator filters – These filters are built into your fridge. When water travels into your fridge, it passes through the filter before it reaches the dispenser.
- Inline filters – These filters are installed on the waterline connecting your kitchen sink to your refrigerator. When water travels through this line, it passes through the filter before entering your fridge. Inline filters give you more choice if your fridge will only fit certain brands or types of built-in refrigerator filters.
The obvious bonus of refrigerator filters is that you get access to cold, filtered water at the touch of a button. On warm days, you won’t have to put your filtered water in the fridge to cool it down, because that’s where it’s come from.
Refrigerator filters cost between $70 and $130 upfront, with an annual spend of $50-$100.
Shower Filters
If chlorine is damaging your skin and hair, one possible solution is a shower filter.
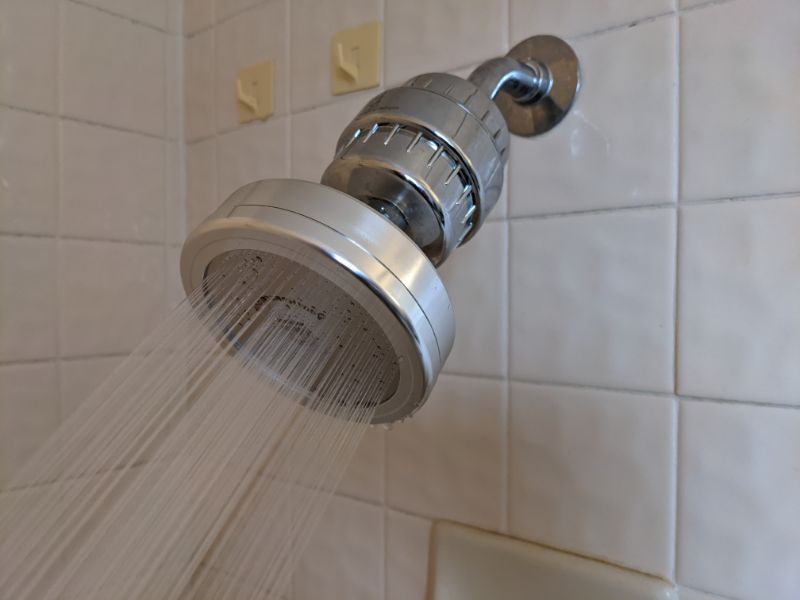
Shower filters are connected to your shower head arm piping. There are two types of shower filters:
- Showerhead filters, which replace your current showerhead on your shower arm.
- Inline shower filters, which connect to the shower arm before your current showerhead. These filters are better if you’d prefer to use your existing showerhead while still filtering your water.
Showerhead filters work by filtering the water that travels through your shower hose and showerhead. As well as removing certain contaminants, some shower filters add healthy minerals to your shower water. Some specific shower filters can even reduce water hardness.
Shower filters cost between $30 and $60 upfront. You can expect to spend $50-$110 per year on shower water filters.
Under Sink Filters
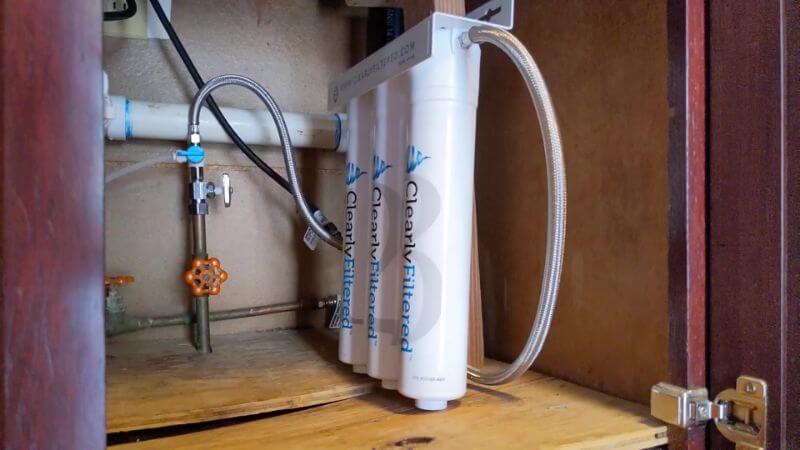
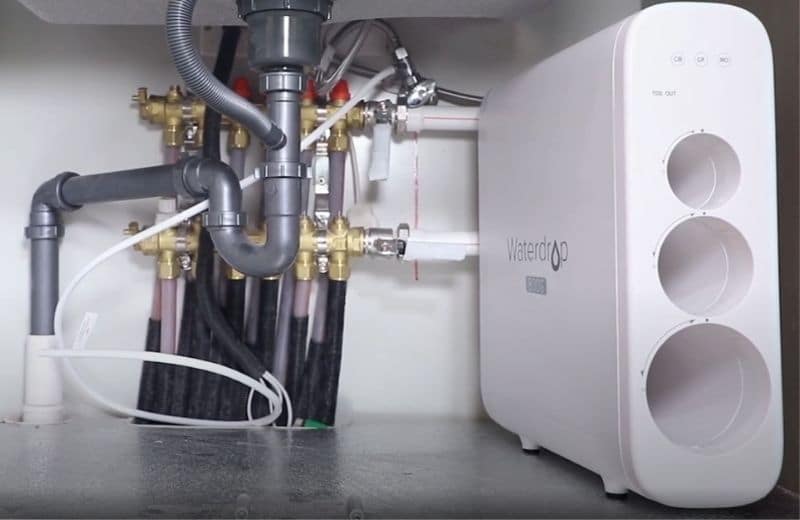
Under-sink filters are installed underneath your kitchen sink. There are two types of under-sink filters:
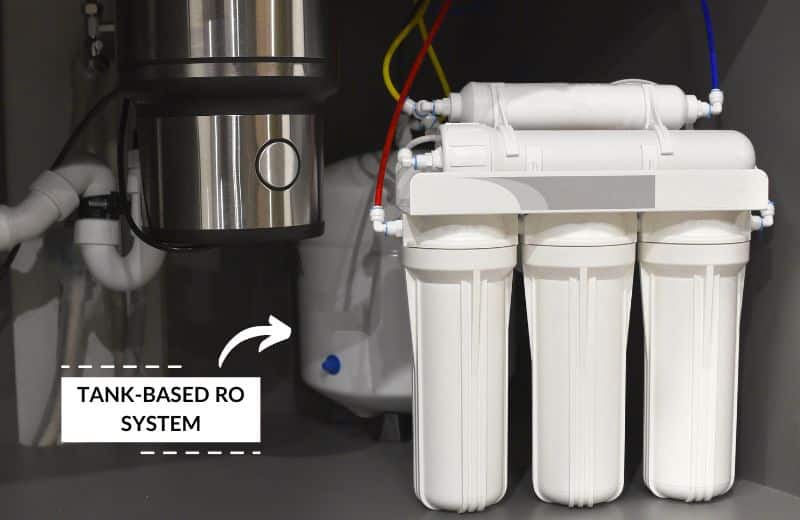
- Under sink RO systems, with or without a water storage tank
- Cartridge-based under-sink systems, with multiple filters
Under-sink systems intercept your waterline, so that when you turn on your faucet, water flows through the filters before being delivered as clean, filtered water from your faucet.
A cartridge-based under-sink system costs $150-$500 upfront and $100-$200 on annual maintenance, while a RO under-sink system costs $500-$1,000 upfront and $100-$250 on annual maintenance.
UV Disinfection Systems
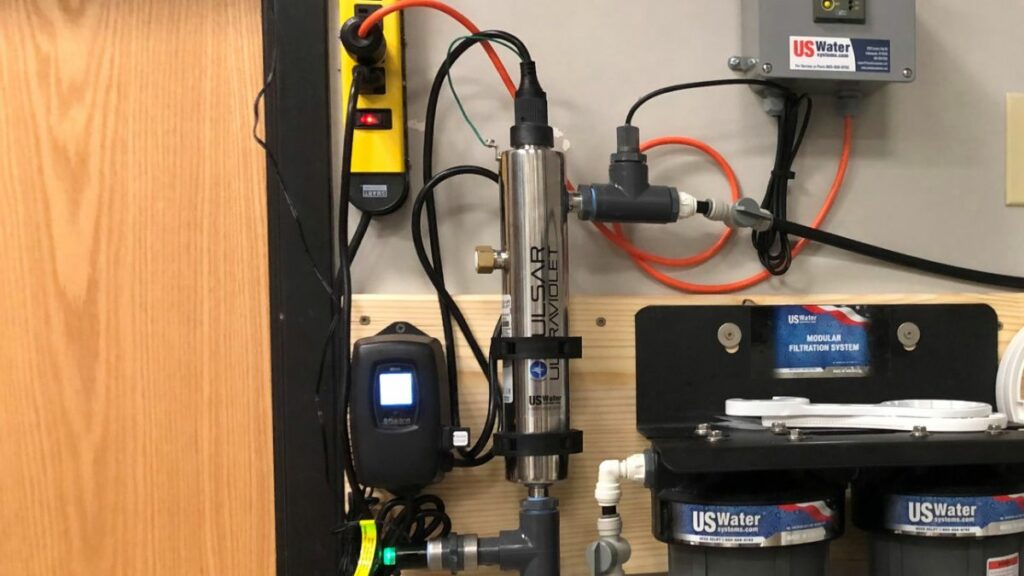
UV disinfection systems use ultraviolet light to kill microorganisms like bacteria and viruses in water. These systems may be point-of-entry units that treat water for the entire house.
Here’s how a UV disinfection system works:
- Water passes through the UV housing before it travels through your household piping.
- While inside the UV housing, water is treated by ultraviolet light, which damages the DNA of microorganisms, killing them and preventing them from reproducing.
- Water travels out of the UV housing and through a filter, safe to drink and free from live germs that could damage the human body.
UV disinfection systems cost $700-$1,000 upfront, with an annual maintenance cost of $100-$150.
See the best rated UV water filter systems & read our reviews in this post.
Whole House Water Filter Systems
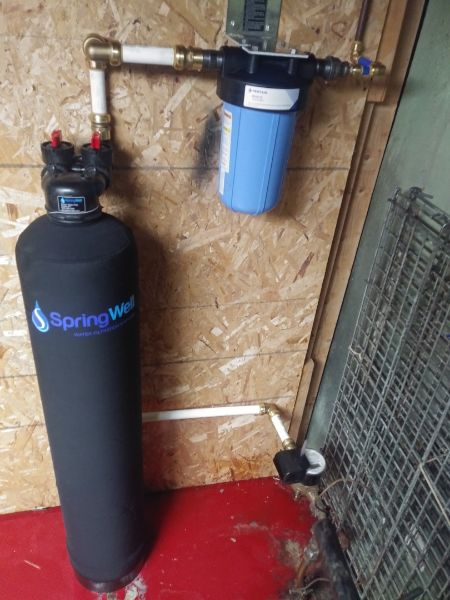
Whole house water filtration systems treat water at your home’s point of entry, providing quality water throughout your entire home.
The original whole house filter units were cartridge carbon-based filters, designed to remove chemicals like chlorine. Other filtration methods gaining popularity for whole home use are:
- Media filters and softeners (utilizing carbon and/or ion exchange resin)
- Whole house RO systems
Whole house filters can remove a broad range of contaminants. Some systems focus on specific contaminant removal, while others are designed to remove as many impurities as possible. Some systems often combine multiple water treatment technologies to address various problems at different stages.
Because they treat your entire home’s water supply, whole home filters are more expensive than other filtration technologies. The average cost of a whole home filter is $1,300-$2,200, with an average annual maintenance spend of $60-$500, depending on the type of system you buy.
💡 Water Filtration System Technologies
I’ve listed some of the most popular methods of water filtration below:
Activated Carbon
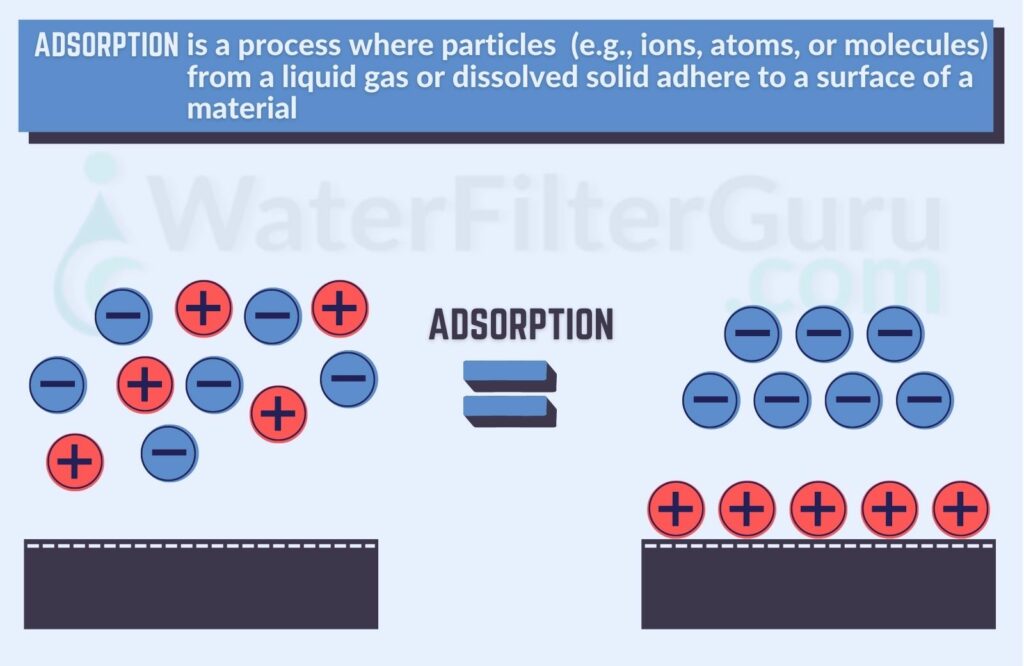
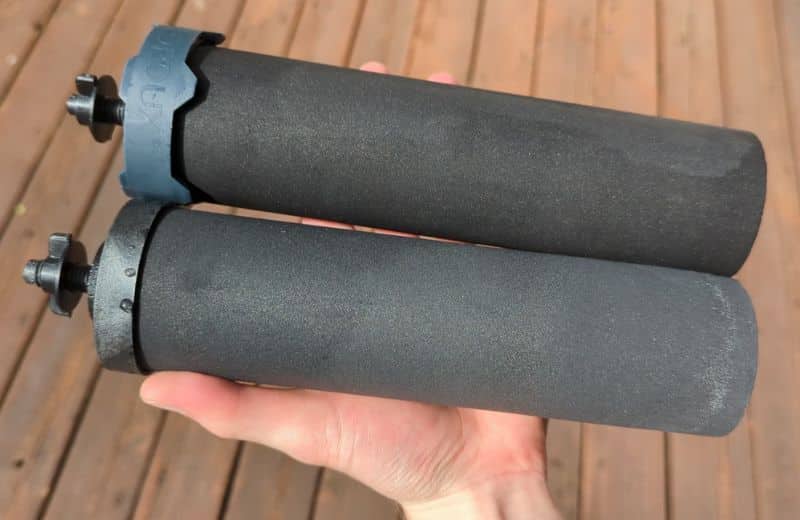
Activated carbon filters are some of the most widely available on the market. These filters are categorized into two types: carbon block and granular activated carbon, which both use adsorption to retain contaminants as water passes through the media.
You can find activated carbon filter cartridges in a range of filtration systems, from countertop pitcher filters to faucet mounted, under-sink and whole-home applications.
How it Works
Activated carbon water filtration systems use adsorption to attract contaminants to the media.
As water passes through the media, the carbon traps impurities like chlorine, lead, and other aesthetic contaminants which may be present in the water supply.
The effectiveness of this type of carbon filter depends on its design. Typically, the larger the surface area of this filter media, the more thoroughly it will filter water, as more capacity exists for adsorption.
Check out our list & reviews of the best activated carbon water filters today
Contaminants removed by activated carbon filters include:
- Chemicals like chlorine and chloramine
- Volatile organic compounds
- Some metals
- Pesticides and herbicides
- Nitrates
- Hydrogen sulfide
Advantages
- Activated carbon is one of the most effective filtration methods for chlorine removal, and for improving water’s taste and removing or eliminating odors.
- AC filters are relatively low-cost items to purchase and easy to maintain – you just replace the filter cartridge when it reaches the end of its lifespan. Alternatively you might be able to clean the filter cartridge to extend its use a bit longer.
- There are a number of raw, sustainable – and eco-friendly – materials that are used in this type of filter, such as charcoal and coconut shell.
Disadvantages
- AC can only remove impurities that are attracted to carbon, so it isn’t ideal for removing contaminants like nitrates, heavy metals, and fluoride.
- The average AC water filter has a relatively short lifespan of 2-3 months.
Activated Alumina
Activated alumina filters are made from aluminum oxide and contain hundreds of microscopic pores, giving the filters a large surface area.
Activated alumina can be used for point of use and point of entry applications. This type of filtration system is best for water with high fluoride and arsenic levels, and is one of the only water filters that can remove these contaminants.
How it Works
Active alumina filters also adsorb contaminants, trapping them in their media.
When water flows through the media’s pores – which act as hundreds of tiny tunnels – certain contaminants, including arsenic, sulfate, uranium, and fluoride, are attracted to, and stick to, the media. When water leaves the filter, the contaminants remain in the media.
Eventually, the contaminants build up to a point where the media is saturated and the pores are blocked, and the filter must be replaced.
Contaminants removed by activated alumina filters include:
- Heavy metals like arsenic
- Chromium
- Fluoride
- Selenium
Advantages
- Activated alumina tackles a specific set of contaminants that most other filter types can’t remove.
- AA is incredibly effective, and can remove up to 99% of a given contaminant, depending on water conditions.
- High TDS levels are less likely to affect AA compared to other adsorption filtration methods.
Disadvantages
- Activated alumina filters need to regenerate, and affects long-term efficiency because a portion of the media is lost with every regeneration.
- Water conditions affect the effectiveness of contaminant removal. For instance, arsenic is best removed at a slightly acidic pH of 5.0 to 6.0, and most people’s water sources aren’t naturally acidic.
Ion Exchange
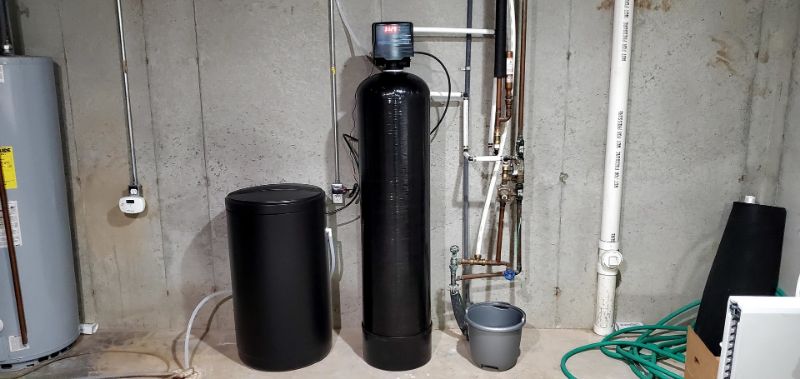
Ion exchange filter media is typically found in a water softening application. Water softeners are installed at your water’s point of entry in your home to provide whole-house softening benefits.
This type of water treatment system removes calcium and magnesium – known as hardness minerals – from water. It can also be used to reduce iron, manganese, and sulfur.
Ion exchange is also used as a filtration stage to remove impurities like copper, cadmium, and zinc.
How it Works
The ion exchange method of filtration works by replacing hard water ions with another type of ion, usually sodium ions or potassium chloride ions.
When water flows through the negatively charged resin bed, the positively charged calcium and magnesium minerals are attracted to it, and adhere to the resin beads. At the same time, positively charged sodium ions are released into the water to replace the removed mineral ions. Thus the term, ion exchange.
This method effectively removes all hardness minerals from water, greatly improving water quality and eliminating your hardness issues going forward. If your water contains low levels of iron, ion exchange can usually remove this metal, too.
Contaminants removed by ion exchange filters include:
- Calcium and magnesium
- Low levels of iron
- Heavy metals like copper, zinc, and cadmium
- Chromium
- Nitrates
- Radium and uranium
Advantages
- If you’re dealing with hard water issues in your home, such as limescale, stained laundry and itchy hair and skin, an ion exchange system is the most effective means of treatment.
- Ion exchange can also be used in water filter applications to remove some metals.
- This filtration method is highly efficient and regenerates over and over again, with an estimated media lifespan of around 8-10 years.
Disadvantages
- This type of water treatment is usually reserved for softening, not filtering – and it can’t be used to remove many contaminants.
- You’ll need a big budget for a water softener, and plenty of space to install the system.
KDF
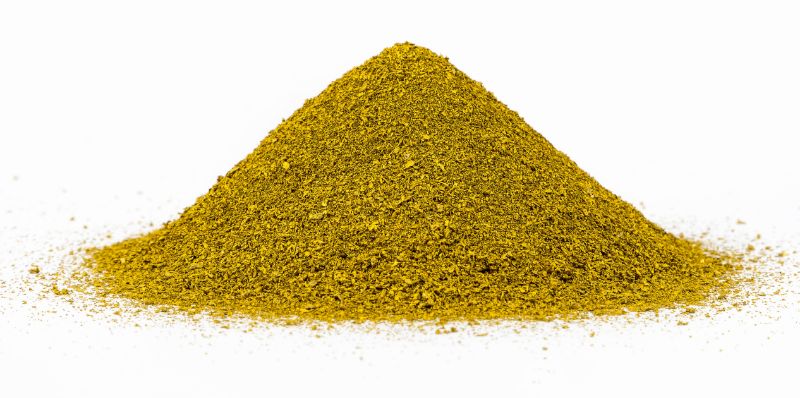
KDF, or kinetic degradation fluxion, is a filter media made from high-purity copper-zinc granules.
KDF media can remove a broad range of contaminants, though the exact contaminants removed will depend on the type of media you opt for.
Some KDF technologies can remove contaminants like heavy metals, while others can filter out chlorine, iron and hydrogen sulfide. Some KDF systems can also remove magnesium and calcium, and even pathogens like algae, bacteria and fungi.
How it Works
When water flows into this media, a redox reaction takes place, which can reduce or remove a select number of contaminants. This works a little like ion exchange: electrons are transferred between molecules and impurities are converted into a different form. They can then be removed from the system with backwashing.
A big advantage of KDF technology is that the process itself has been certified by NSF International to Standard 61. Having a certification from an accredited testing body in the United States means that KDF can be trusted as a safe, legitimate water treatment solution in your home.
Contaminants removed by KDF filters include:
- Chemicals like chlorine and chloramine
- Heavy metals like lead
- Magnesium
- Mercury
- Iron
- Hydrogen sulfide
Advantages
- KDF filtration technologies are NSF certified for their performance.
- Different KDF filters can remove different drinking water contaminants, and you can often use several types of KDF media to tackle a broader range of impurities.
- KDF has antibacterial properties and prevents the growth of bacteria during filtration.
Disadvantages
- A KDF filtration system can’t be used to remove organic contaminants like pesticides and disinfection byproducts.
- The filters need to be backwashed with hot water to remove insoluble impurities from the media.
Reverse Osmosis (RO)
Reverse osmosis filters can be installed for under-sink, countertop, and whole-house use. Under-sink filters tend to be the most common option.
RO water filtration can remove up to 99.9% of TDS (total dissolved solids) depending on the manufacturer.
How it Works
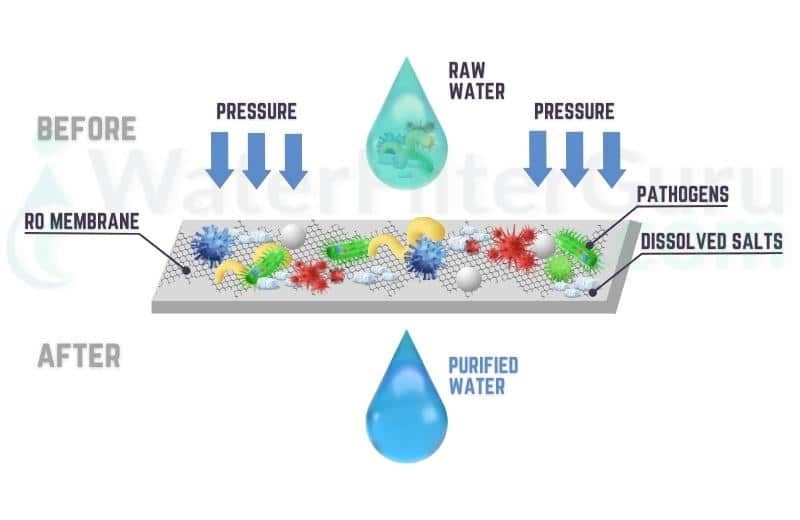
In a reverse osmosis unit, unfiltered water flows through a number of filtration stages, namely a sediment pre-filter, a carbon filter, a semipermeable membrane and a post-filter.
The most impressive feature of any RO system is the semi-permeable membrane. This membrane has tiny pores that prevent almost all minerals, salts, heavy metals, chemicals and even certain microorganisms from passing further into the system.
The result is that only tiny drinking water particles make it out the other side, while a small amount of water containing impurities is washed down the drain.
What’s the difference between a water filter vs reverse osmosis system? Find out here!
Contaminants removed by RO filters include:
- TDS
- Chemicals like chlorine and chloramine
- Pesticides and herbicides
- Sediment
- Nitrates
- Fluoride
- Minerals and salts
- Bacteria
- Volatile organic compounds
- Hydrogen sulfide
Advantages
- Reverse osmosis is one of the most capable water filtration methods, and produces near-pure water.
- If you want to protect yourself from contaminants, a reverse osmosis filter will give you peace of mind, removing up to 99.9% of TDS.
- You can choose where to install a reverse osmosis system – whether you prefer a countertop, under-sink, and whole home water filtration system.
Disadvantages
- Reverse osmosis systems waste a lot of water. With RO drinking water filters, this water waste isn’t so noticeable. But if you buy an RO whole home water filtration system, you’ll notice a rise in your water bill.
- Reverse osmosis removes healthy minerals as well as dangerous contaminants, which can leave water tasting flat.
Ultrafiltration (UF)
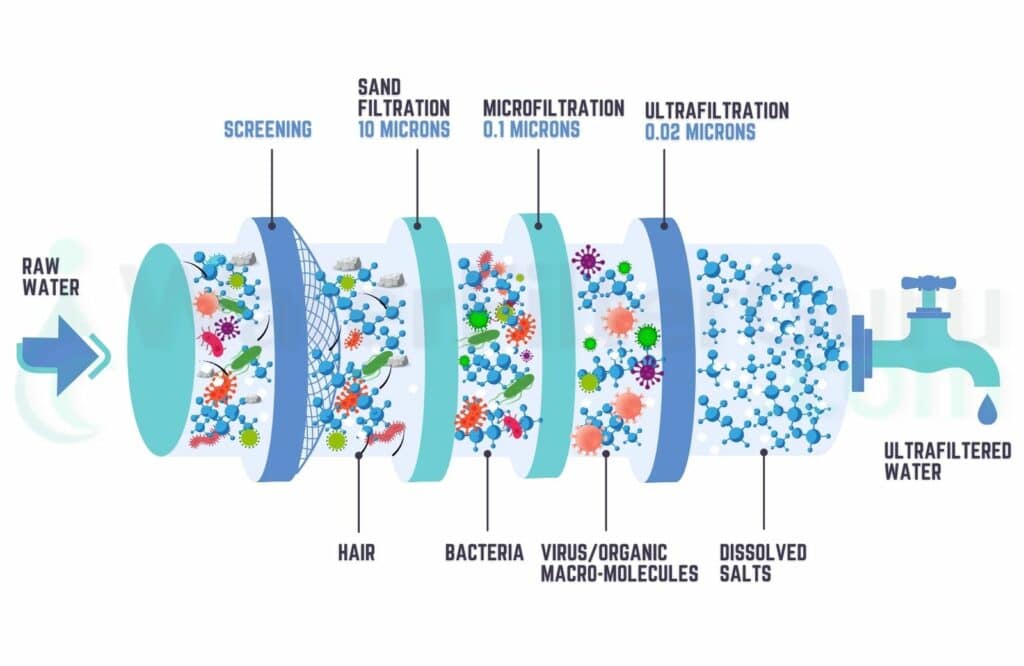
Ultrafiltration is a filtration process that uses a high pressure to force water through a membrane.
Ultrafiltration has a tiny pore size of 0.1-0.01 microns, making it a good choice for removing tiny contaminants that pass through most filters. UF can remove contaminants as small as 0.025 microns from water.
How it Works
A UF membrane contains thousands of tiny pores, like an RO membrane. Only water and highly soluble particles can fit through these pores. However, the biggest difference between UF and RO is that ultrafiltration retains healthy minerals and salts, while RO filters these out.
The contaminants are unable to pass through the membrane, effectively filtering them out of water.
Contaminants removed by ultrafiltration include:
- Chemicals like chlorine and chloramine
- Pesticides and herbicides
- Sediment
- Nitrates
- Fluoride
- Bacteria
- Volatile organic compounds
- Hydrogen sulfide
Advantages
- Ultrafiltration can remove a number of tiny, difficult-to-remove contaminants, like bacteria and some viruses.
- Although ultrafiltration produces similar results to RO, this type of filter method doesn’t produce wastewater and doesn’t take up space with a water tank.
- UF effectively disinfects water without the use of chemicals.
Disadvantages
- You’ll need to clean and replace a UF membrane as recommended by the manufacturer.
- A pre-filter is needed for ultrafiltration to prevent the membrane from being damaged by large contaminants.
Deionization (DI)
Deionization is a process that removes both positively and negatively charged ions from water, producing a solution that’s entirely free of charge.
Ions in tap water can come from a number of sources, such as pipes and soils. Some examples of the impurities that may affect water’s charge are magnesium, calcium, iron, sodium, carbonates, nitrates and sulfates.
How it Works
The deionization process takes place in a deionizer. Water runs through an electrically charged bed of resin, which retains cations and anions responsible for water’s charge. When the process has finished, the system flushes out the resin bed to remove these impurities.
While deionization can effectively eliminate the majority of minerals and salts, it doesn’t tend to be an option for removing contaminants like chemicals and heavy metals. You would have to combine a deionizer with another water filtration solution if you wanted to tackle a broader range of contaminants.
Contaminants removed by deionization include:
- Calcium
- Magnesium
- Iron
- Nitrates
- Sodium
- Carbonates
- Sulfates
Advantages
- Deionized water supposedly has some detoxification benefits, although more studies are needed to confirm this.
- The deionization process is quick and requires no physical filter cartridges, so there’s less maintenance to think about.
Disadvantages
- Deionization doesn’t remove many dangerous contaminants from water.
- Deionized water tastes flat and unappealing because it contains no healthy minerals and salts.
Mechanical Filtration
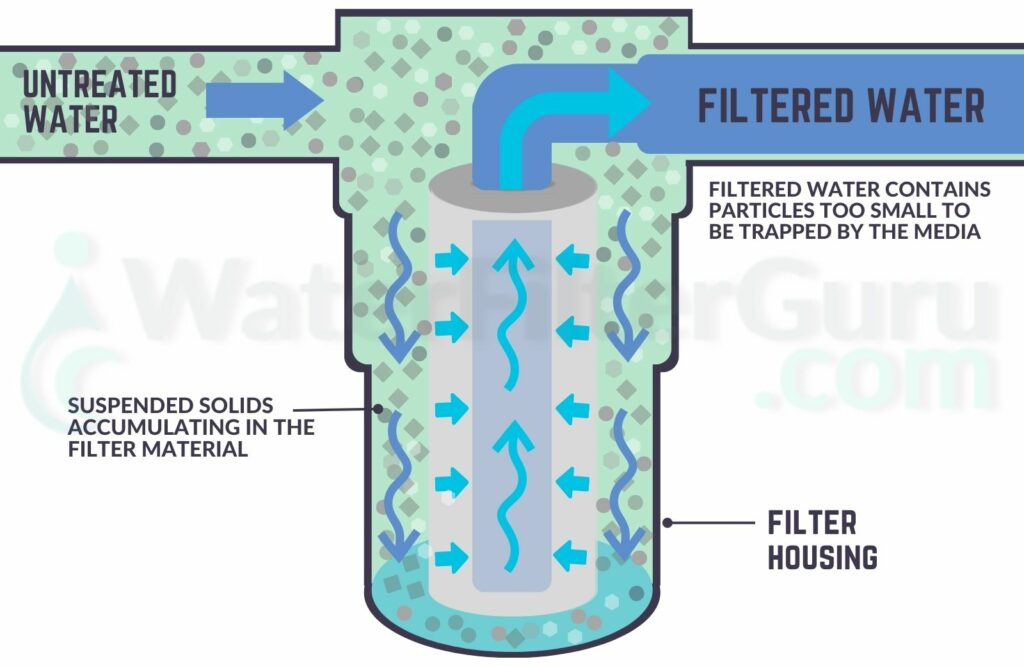
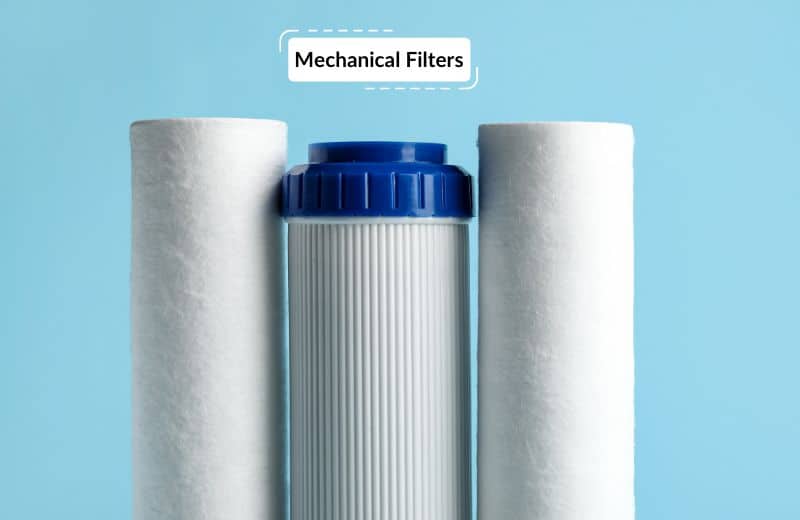
Mechanical filtration is a process in which contaminants are physically removed using a special blocking application. Normally, a mesh screen is used to filter out larger contaminants, like dirt, rust, sediment and sand, followed by a ceramic filter, which is designed to trap impurities like microorganisms.
How it Works
The performance capabilities of a mechanical water filter depend on the micron size you opt for.
A mechanical water filter with a 5-micron rating will be best suited to remove particles that are too small to be seen by the human eye, while a 1-micron mechanical filter will remove even smaller particulates that require a microscope for viewing.
The lowest available micron rating for a mechanical filter is 0.5 microns; this can remove microorganisms like cysts (giardia and cryptosporidium).
Contaminants removed by mechanical filters include:
- Organic matter
- Sediment like sand and silt
- Cysts
- Bacteria
- Heavy metals
Advantages
- Because there are many micron sizes available for mechanical filtration, you can choose the right filter for your contaminant removal needs.
- Mechanical filtration can remove pathogens – a rare feat for a water filter.
Disadvantages
- Mechanical filtration is an effective solution for drinking water that contains dirt, but it won’t remove chemicals, so you may need to use it in conjunction with another filter for the best results.
- Not all mechanical filters offer the same results – it depends on the quality and micron size of the filter.
Ultraviolet Disinfection (UV)
UV disinfection is the process of destroying microorganisms in water using ultraviolet light. UV disinfection units may be installed at a home’s point of entry to eliminate pathogens and germs before they enter the home’s water system.
How it Works
A UV purification system features a UV lamp housed in a sleeve. When water flows through the system, the lamp emits UV light, which penetrates the outer membranes of microorganisms and damages their DNA, killing the cells and preventing them from reproducing.
UV disinfection can kill a range of microbial contaminants, including:
- Bacteria
- Viruses
- Algae
- Protozoa
- Cysts
Advantages
- UV purifiers don’t filter out microorganisms; they kill them. This means you’re much better protected from germs.
- UV purifiers require minimal maintenance – you just replace the UV lamp once a year.
Disadvantages
- UV disinfection can’t physically remove impurities from water, and can only be used to kill pathogens.
- This type of water treatment can only be used on clear water. UV isn’t effective on turbid or cloudy water. You may need a sediment filter to treat water flowing into the UV lamp.
💡 What water filter do I need? Take our Quiz to Find out!
💭 Home Water Filtration Considerations
Don’t make the mistake of buying a filter without first considering these factors:
Municipal Water vs. Well Water
The source water you’re treating will determine the type(s) of water filter(s) that are suitable for you. Knowing the source water chemistry being treated is essential to applying the correct solution.
Well water may contain a completely different selection of contaminants compared to city water. While city water’s biggest problem contaminants are chlorine and lead, well water is more likely to have issues with iron and bacteria.
Some water filters are designed solely to treat one type of water. In this case, it’ll probably say so in the product details (e.g. “Provides well water filtration”). Other filters are so thorough that they offer near-enough water purification, making them suitable for both city and well water.
Water Chemistry & Contaminants Present
Your water chemistry and contaminants present will affect not only what type of filter you need to remove those contaminants, but which filters can be effectively used given your water quality.
Understand your water chemistry. Some types of water filters, especially well water filters, work best with water within a certain pH range. Make sure to check the required water parameters for a filter before you buy it.
It’s essential to know the contaminants present in your water before you start looking at water filters. Why?
Because you won’t know which contaminants to remove until you know what your water contains.
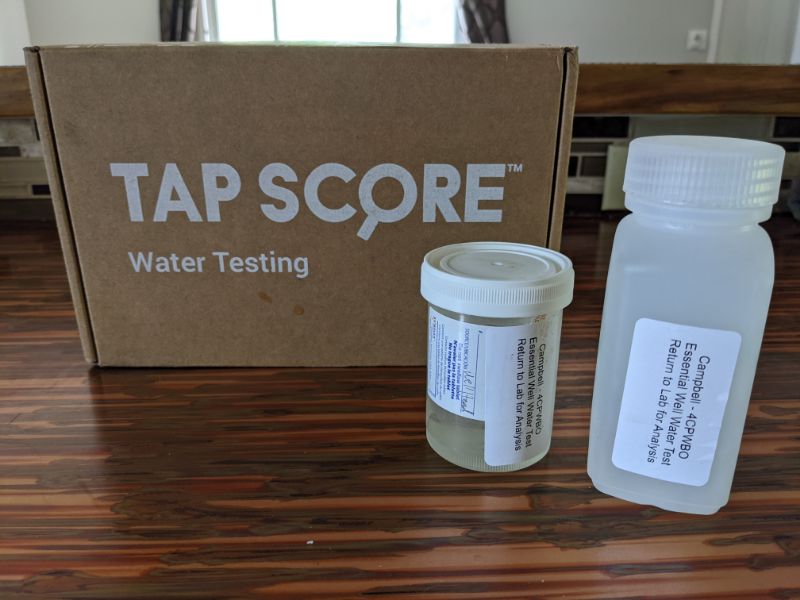
For the most comprehensive insight into your water quality, we recommend testing your water with a certified laboratory like SimpleLab. But if you don’t want to spend hundreds of dollars to know exactly what’s in your water, you have two other alternatives:
- Use an at-home testing kit (well water and city water)
- Look at your annual water quality report (city water)
Once you know what your water contains, you’ll be able to narrow down your water purification and filtration options based on what you want to remove.
Point of Entry vs. Point of Use
One of the biggest considerations you’ll need to make is whether you want to install a point of entry or point of use water filter.
Point of Entry Water Filters
Point of entry filters are installed at your water’s point of entry into your home.
The purpose of this type of water filtration system is to filter your water before it travels through your plumbing or appliances. If your water contains contaminants that could damage your pipes or appliances, these contaminants will be removed before they can do any harm.
Point of Use Water Filters
Point of use water filters are installed at (take a guess) a point of use location, such as underneath your kitchen sink or on your kitchen countertop.
Point of use filters are designed for drinking water filtration. These filters filter your water right as it’s about to come out of your faucet (in the case of under-sink or faucet-mounted filters) or after (in the case of pitcher filters). If your only concern is clean drinking water, point of use filtration may be the answer.
House vs. Apartment
Houses have more space than apartments, and your options may be somewhat limited if you live in an apartment.
If you don’t have room for a bulky point of entry filter, and your under-sink space is lacking, there are still plenty of filters for apartments and condos to choose from.
Many of our review team live in apartments, and we’ve found that faucet mounted filters, countertop systems, water filter pitchers, refrigerator filters, shower filters and sometimes under-sink units are all suitably sized for apartment use.
Renter vs. Owner
Whether you rent or own your home will affect what type of water filter you can install.
If you rent your home, check your rental terms. Most landlords don’t allow you to install water filters that require cutting into your waterline, which is a permanent action – if you were to remove the filter when you moved out, you’d end up with a gap in your pipes.
In this case, you still have plenty of choices. Look at filters that require non-permanent installation, or filters that require virtually no installation at all, like pitcher filters, countertop filters, faucet-mounted filters, and water bottle filters.
If you’re a homeowner, you don’t have to worry about choosing a landlord-friendly filter for your home, so go wild! Your choices are endless.
📌 Features
Be mindful of the potential features of a water filter before you begin your search. Not all filters have the same features, so it’s worth knowing what to look for before you get started.
Filtration Method(s) & Contaminant Removal Capability
Now that you know what contaminants are in your water, you can determine which filtration method (or combination of methods) you will need.
Remember that not all methods of filtration will take care of every problem present and you may need to combine systems to achieve the desired water quality.
Additionally, some systems are designed to alter the pH of water, making it more alkaline and desirable to drink.
Certifications
Certifications aren’t the beat-all-end-all, but if a filter is certified by an independent testing body, it tells you several things:
- The manufacturer believes in their product enough to apply for a certification.
- The filter’s performance is reliable enough to achieve a certification.
The well-known testing and certification body in the water treatment industry is NSF International. This independent organization sets high standards for the water treatment industry for contaminant removal. There are tens of NSF certifications, each specific to different filtration processes and different contaminants removed.
Some of the most common NSF certifications are:
- NSF 42, for chlorine and chloramine removal
- NSF 53, for contaminants with health effects, like lead
- NSF 55, for UV systems that kill bacteria, viruses and cysts
- NSF 58, for RO systems
- NSF 62, for water distillers
- NSF 177, for shower water filters
- NSF 401, for emerging contaminants
We don’t rule out filters that don’t have an NSF certification because official certifications are notoriously expensive, and some manufacturers simply can’t afford them at the moment. If a filter isn’t certified, check that it’s at least tested to NSF Standards by a trusted laboratory, and its test data is available online.

Filter Capacity (Lifespan)
It would be great if there were filters that could last forever, but alas, this has so far proven an impossible feature to achieve.
The capacity of a filter, or how long a filter lasts, affects its maintenance requirements. Not all filter systems have the same lifespans; for instance:
| System Type | Average Capacity (Lifespan) |
|---|---|
| Whole House Systems | 500,000+ gallons (6+ years) |
| Sediment Cartridges | 3,000 gallons (6 months) |
| UV Lamps | 1 year |
| RO Membranes | 1,200 gallons (2 years) |
| Under Sink | 600 gallons (6 months) |
| Countertop | 150-1,000 gallons (2-8 months) |
| Pitchers | 150 gallons (2-6 months) |
| Faucet Mounted | 100-300 gallons (2-4 months) |
| Refrigerator | 200 gallons (6 months) |
A filter’s capacity determines how many filter replacements you need to make per year. If you’re not a fan of maintenance, look at filters that require fewer filter replacements per year.
Keep in mind that buying a filter with a bigger capacity doesn’t necessarily mean that you’ll spend less money on replacing the filter. It all depends on the cost of the replacement filters.
Flow Rate
The flow rate of a water filter is a measure of the rate at which water can flow through the filter.
Filters that connect to your waterline, like whole home filters, under sink filters, and faucet filters, provide near-immediate access to clean drinking water.
Standalone filters, like gravity countertop filters, dispensers, and pitchers, take longer to filter water because they don’t have the force of water pressure to send water through the filter.
However, a slower filtration speed is actually a benefit for adsorption filters, because a longer contact time between the water and the filter media allows for more contaminants to be removed.
If you’re happy to wait five or ten minutes for a glass of filtered water, pitcher filters are a good option to consider because of their thorough contaminant removal abilities. But if you enjoy the convenience of using water the instant you need it, you’ll prefer filters that hook up to your waterline.
Construction Materials
There are a variety of materials used to make water filters – the most common materials are plastic, stainless steel, and glass.
Plastic is lightweight and cheap to buy, making it a good construction material for water filters. However, if you do choose a plastic filter, make sure the material is BPA- and BPS-free and durable. Tritan is one of the best plastics for durability.
Stainless steel and other metals are usually used for smaller components within a filter system, although some countertop filters, like the Big Berkey, use stainless steel for their filter housing. Stainless steel is a good option for filters because it’s durable, it doesn’t rust, and it doesn’t leach harmful contaminants into drinking water.
System Footprint
The size of a water filter, or its footprint, is important if you have limited space in your planned installation location.
Before buying a filter, measure your available space and compare it to the system measurements. Make sure there are a few inches of space around the filter to allow for easy maintenance, such as filter changes.
If you do need a system with a smaller footprint, look at filter pitchers – which can easily be stored away when they’re not in use – and faucet mounted filters – the smallest filters available today.
Easy Filter Changes
Changing the filters is an inevitable chore for any filter system owner.
For this reason, you want the job of changing the filters to be as easy as possible, so the whole process takes a matter of seconds.
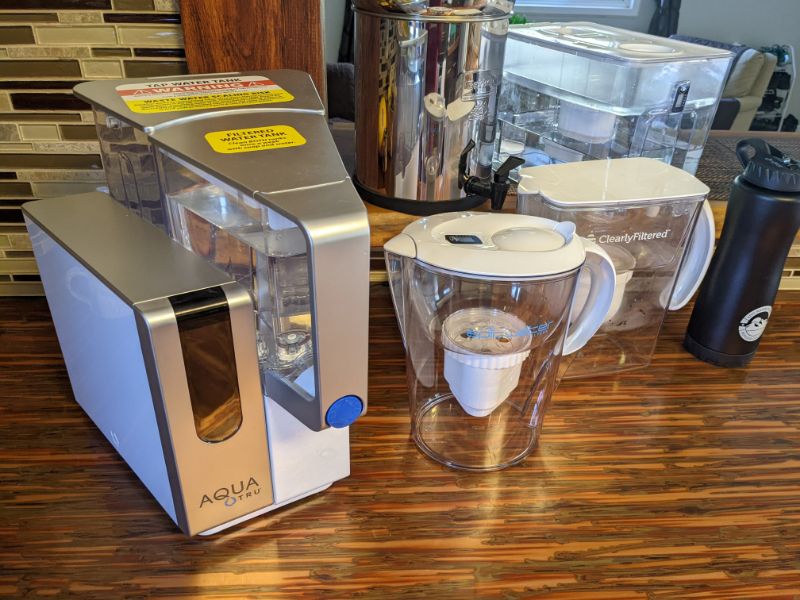
Look for filters that have “one twist” or “one click” filter changes, where you simply twist or click the old filter out of place, then twist or click the new filter into the housing.
If you’re not a DIY fan, avoid filters that need to be screwed into place using a wrench.
Guarantee & Warranty
A filter’s warranty and guarantee can tell you a lot.
For a start, if a filter doesn’t even have a warranty, let alone a guarantee – AVOID.
A warranty tells you that the manufacturer is confident enough in their filter to offer you a replacement if you receive a defective product.
A guarantee tells you that the manufacturer is so certain that you’ll love their product that they’re willing to entice you into a sale by guaranteeing your money back within the first few months of owning the product.
Being covered by a warranty and a money-back guarantee means you can make a no-risk purchase, knowing that you can get a full refund or a replacement product if something isn’t right.
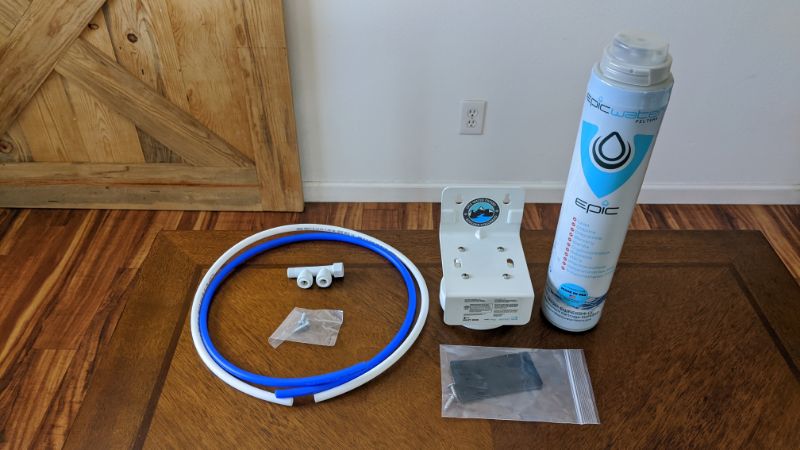
Installation Kit
If you buy a filter system to install underneath your kitchen sink or at your home’s point of entry, check to see whether the filter comes with an installation kit.
Unfortunately, most filter systems won’t come with everything you need for installation. You’ll probably have to go out and buy your own fittings and adapters.
That’s what makes installation kits so handy. You’ll receive everything you need for installation upfront, so you won’t need to hunt around for separate bits after you’ve made a purchase.
Some manufacturers offer free installation kits, but most offer these kits at an extra charge.
💵 Costs
There are several costs involved in buying and owning a water filter, including the upfront system price, installation costs, and the price of maintenance and replacing the filters.
Upfront System Price
| System Type | Average Cost Range |
|---|---|
| Whole House Systems | $1,000 - $4,000+ |
| Well Water Systems | $1,000 - $4,000+ |
| UV Disinfection Systems | $200 - $1,000+ |
| Reverse Osmosis Systems | $200 - $4,000+ |
| Countertop | $50 - $400 |
| Under Sink | $50 - $500 |
| Pitcher | $30 - $100 |
| Faucet Mounted | $15 - $50 |
| Refrigerator | $20 - $150 |
Installation
| System Type | Labor | Average Installation Cost |
|---|---|---|
| Whole House Systems | 2 - 5 hours | $200 - $500+ |
| Well Water Systems | 2 - 5 hours | $200 - $600+ |
| UV Disinfection Systems | 2 - 3 hours | $300 - $500+ |
| Reverse Osmosis Systems | 1 - 5 hours | $100 - $500+ |
| Under Sink | 1- 4 hours | $100 - $350+ |
| Countertop | n/a | n/a |
| Pitcher | n/a | n/a |
| Faucet Mounted | n/a | n/a |
| Refrigerator | n/a | n/a |
Maintenance & Filter Changes
| System Type | Annual Filter Replacement Cost |
|---|---|
| Whole House Systems (pre-filter) | $25 - $100 |
| Well Water Systems (pre-filter) | $25 - $100 |
| UV Disinfection Systems (lamp + pre-filter) | $100 - $300 |
| Reverse Osmosis Systems | $70 - $200 |
| Under Sink | $75 - $300 |
| Countertop | $50 - $250 |
| Pitcher | $15 - $250 |
| Faucet Mounted | $30 - $100 |
| Refrigerator | $40 - $300 |
🔧 Installation
Before buying a filter, check to see what type of installation is required – and whether it’ll be possible to install the filter yourself.
DIY vs. Professional
Some filters, like pitcher filters, countertop gravity filters, refrigerator filters, and faucet filters, are the easiest filters to install. In fact, some require no installation at all – you just assemble them, flush the filter, and that’s it.
Other filters, like under sink filters and whole home filters, have more complex installation processes. The type and design of the system determine the complexity of installation. Some manufacturers design their filters to be relatively easy to install, as long as you follow the step-by-step instructions. Other filters can be tricky to install even by a competent DIY-er.
If your heart is set on a filter that you don’t think you’ll be able to install yourself, it’s not the end of the world. You can simply pay for a professional to install the filter for you, which gives the added reassurance of knowing for certain that the installation process has been done right.
Of course, professional installation isn’t free. You’ll need to pay, at a minimum, an extra $100-$200 for a plumber or water treatment professional to install your filter for you.
🔍 Companies
We test all our filters in our own homes, so we know exactly how they live up to a customer’s expectations.
There are so many companies making water filters today, including Apec Water Systems, Aquasana, Culligan, Brita, PUR, ZeroWater, Berkey, Clearly Filtered, SpringWell, Epic, and Waterdrop – to name just a few.
It’s safe to say that some manufacturers offer better products than others.
We’re familiar with the majority of manufacturers selling filters today, but we look beyond the brand’s reputation to how its products live up to expectations with realistic everyday use. We’ve reviewed a wide variety of water filtration units, from point of use to whole home and everything in between.
Comparisons
If you want to see which of the best filters are superior when they’re competing head-to-head, our comparison reviews will be right up your alley.
We’ve compared the filters which are similar, giving you the information you need to decide which filter best suits your needs.
- Alexapure vs. Berkey
- Alexapure vs. ProOne
- AquaTru vs. Berkey
- AquaTru vs. RKIN
- AquaTru vs. ZeroWater
- Berkey vs. Brita
- Brita vs. Santevia
- Clearly Filtered vs. Aquatru
- Clearly Filtered vs. Berkey
- Clearly Filtered vs. Brita
- Clearly Filtered vs. Epic Water
- Clearly Filtered vs. Seychelle
- Clearly Filtered vs. ZeroWater
📝 Summary
Buying a filter for your home is a big decision. There are hundreds of trace contaminants in water, and the right water filter can ensure you’re protected from the contaminants in your own water supply.
Now that you know the basics about water filtration, it’s time to start researching products.
Choosing a filter to buy is undeniably the fun result of the research, until you have to actually spend your money, of course.
Make sure to keep a clear head – and don’t get sucked into manufacturers’ marketing claims! They’ll all try to convince you that their products are more capable than any other product on the market. Before you buy a filter, ask yourself what impressed you most with a filter, and how the filter is any better than the others you’ve been looking at.
If you need any help, we have plenty of resources here at WaterFilterGuru to keep you busy. We’ve reviewed the best water filters in all categories, so if you need to narrow down your top 50 to a top 5, we’re here to help. A good place to start is our best water filters guide.
🙋♀️ Drinking Water Filter FAQs
What do water filtration devices do?
The purpose of a filter for water is to remove harmful contaminants, making water safe to drink and improving its taste. Different filters use different processes to achieve these results.
Isn’t my water safe already?
If you get you water from a municipal supplier, then yes: technically, your water is safe to drink. However, even treated water contains traces of impurities that are dangerous to human health.
Will I get more value from paying more money?
Not always. For instance, water pitchers are pretty cheap, but many of them can remove hundreds of contaminants and are just as effective as expensive whole-home systems, but may lack some of the conveniences of more expensive systems.
Will a filtration unit affect my flow rate or water pressure?
Possibly, especially if sized incorrectly for the application. You might have to wait half a second for water to flow through the filter before it leaves your faucet. If you do notice a significant drop in water pressure, you may have incorrectly sized your system, or the filter may need replacement.
Can I use a filtration system to soften hard water?
No. Some systems, like RO systems, can remove Low levels of hardness. But high hardness can actually damage the semipermeable membrane and shorten its lifespan. If you want to tackle water hardness, you need a water softener.
Can you recycle filtration cartridges?
It depends. Some brands offer recyclable cartridges, and some even have their own recycling programs, allowing you to return your used cartridges in place of a free filter. If you’re eco-conscious, there are plenty of recyclable filters to choose from.
Which filtration systems are best for small budgets?
The best systems for small budgets are pitchers, faucet filtration systems, and fridge filtering units. These systems cost less than $100 upfront and around $100 in annual maintenance. You could also consider a simple portable filter like a filtered water bottle.
Which contaminants are most important to remove?
That’s a difficult one to answer. You might be more bothered about the way your water tastes, or you might want your water to be as safe and healthy as possible. As a starting point, look at filters that can at least remove chlorine, lead, asbestos, and VOCs.
Check out this post to learn about the best water filter test method to determine effectiveness.
What is the most effective filtration system?
Reverse osmosis is considered the most effective filtration system because it virtually purifies water. That’s not to say that reverse osmosis is right for you, though. Some people think reverse osmosis water tastes a bit flat because it’s had all its essential minerals removed.




I have a Pex water supply system in my house. Is there a filtration system that will remove plastic contaminates? Great article by the way.
Check out this article https://waterfilterguru.com/how-to-remove-microplastics-from-water/
Hi Brian, You don’t seem to have mentioned anything like the Zazen Water Filtration System or similar (I assume there is something similar available in North America). Can you please review something like this? Thank you!
Hi Janette, as the majority of my audience is in North America, I am primarily focused on testing and reviewing products available in this geo.
Would filtering already softened water provide any additional benefits, or would it be redundant since the water is already treated by a water softening system?
No, it would not be redundant. Water softeners only treat a select few contaminants. Other water problems require additional treatment!
Excellent article. Very clear and informative. I am looking for an effective under sink filter and this information has helped me to narrow the choices. Thank you! I live in an area with very hard water and so everyone has water softening systems. I have a Kinetico water softening system. So for drinking water my kitchen sink has a dedicated faucet. I assume the best choice for filtering my water for drinking would be to connect it to this facuet dedicated to the non-softened water supply. Since all my drinking water or water used for cooking would come from this faucet, what benefit would there be to connect the under sink filter system to the normal faucet that brings in the softened water?
Hey Spencer, thanks for your comment! We typically recommend a reverse osmosis system as the best/ most broad treatment for drinking and cooking water using a dedicated faucet at the kitchen sink. There is no way to get unsoftened water to the kitchen sink, as the water softener treats the water at the point of entry.
Does this help answer your question?