Just purchased your own water softener? Don’t be so quick to call a plumber. Providing you have a basic grasp of DIY and an ability to follow instructions, you should be able to install a water softener within 2-4 hours.
📌 To install a water softener, shut off your water supply, then cut into your water line and attach the bypass valve, inlet and outlet ports, drain line, and overflow connection. Follow the manufacturer’s instructions to prepare your softener for use.
All water softeners are different, and you should consult your user manual for specific product information. However, most require the same basic installation process.
Learn more about how to install a water softener in this simple step-by-step installation guide.
Table of Contents
🧰 What You’ll Need
Before you install a water softener, you need to have the right tools and materials for the job.
Tools
- Slip joint pliers
- Plumber’s tape
- A tape measure
- Pipe cutter
- Torch and solder
Materials
Your water softener might not come with all the materials needed for installation. Check whether you need to buy the following:
- Flexible tubing or copper tubing
- Adaptors and fittings
- Valves and tees
- Drain tubing
- Air gap fitting
You’ll also, of course, need a water softener. Make sure you size your system appropriately. Generally:
- 1-4 people need minimum 30,000 grains
5-6 people need minimum 40,000 grains
Your water softener should come with all the basic components, including a brine tank, a control valve, and a mineral tank pre-loaded with resin.
🤔 Where to Install a Water Softener
Before we share how to install a water softener, let’s look at where to install your system.
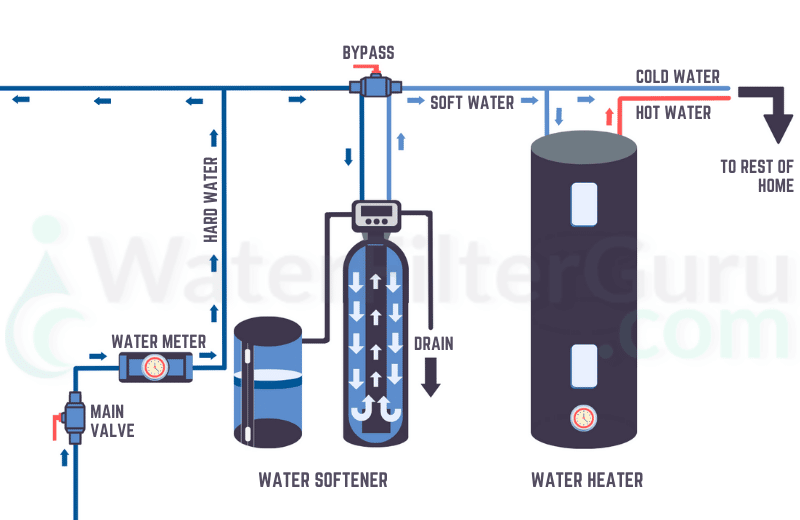
Water softeners should be installed at your home’s main water supply pipe, upstream of your water heater, as close to a home’s point of entry as possible.
A water softener removes minerals from your water supply and prevents scale buildup in your plumbing systems. The further up your water supply line you can install your softener, the more of your pipes and plumbing can be protected from scale.
If you don’t have enough space for an indoor installation in your water supply system, you may also be able to install a water softener outdoors.
- If you have a municipal water supply, install the softener downstream of your water meter.
- If you get your drinking water from a private well, install the system downstream of the pressure tank.
We also have a specific guide on how to install a water softener with a well.
📑 Installation Diagram
Here’s a diagram for all you visual learners out there!
Considerations to Make when Choosing a Water Softener Location
When you’re deciding where to install your water softener, consider the following things:
- Whether or not you want to drink softened water or use soft water in your yard. Depending on your existing plumbing setup, it may be possible to install the softener downstream of a cold water line that supplies an outdoor faucet or drinking water for your kitchen sink.
- Where your nearest electrical outlet is. Most modern softeners need electricity to run.
- Whether you have at least 10 feet of piping between your water softener and your water heater to prevent a backflow of hot water into the softener during regeneration.
- The positioning of your softener from your drain. The unit should be at least 20 feet away from a drain to reduce the risk of backflow and air breaks. There are several types of drains you can use, including a floor drain, a sump, a utility sink, a standpipe, and a laundry tub. A floor drain is best.
- Whether or not your home has a “soft water loop”. This is common in modern homes, and simply means that your home is pre-plumbed with a copper line that has a loop, allowing you to easily install a water softener without having to do any major plumbing.
Typical Basement Installation
When installing a water softener in your basement, place the system as close to the entry point of the incoming water pipe as possible.
Install the softener upstream of your hot water heater. This will stop hard water scale from damaging the heating appliance, and provide hot and cold soft water to your home.
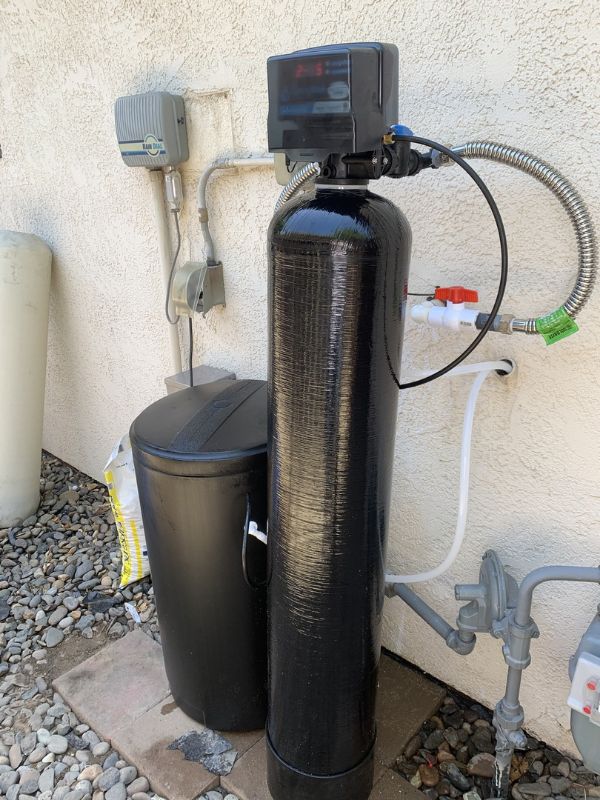
Outdoor Installation
Outdoor installations require a little more forethought. Most water softeners can be put outside, but it’s best to look for one that is specifically advertised for both indoor and outdoor use.
Install the system on the side of your house, as close to your water’s point of entry as possible.
You’ll need to protect your water softener from the elements. Rain, snow, icy temperatures and direct sunlight can all damage the exterior of your system and shorten its lifespan. Humidity and freezing could also damage the softener salt, which may hinder the performance of the unit.
You can buy covers and enclosures for an outdoor water softener, or construct your own housing. Ensure the whole system is protected against water damage, including any pipes and cables.
📝 Water Softener Installation Step-by-Step
Let’s look at how to install a water softener at your main supply line. Be sure to check your local plumbing codes before you get started.
Step 1: Preparation
First, switch off your water supply. This will stop water from escaping your plumbing while you install the ion exchange system.
If your home uses an electric water heater, you should turn this off as a precaution.
Open the faucets in your home to drain the water.
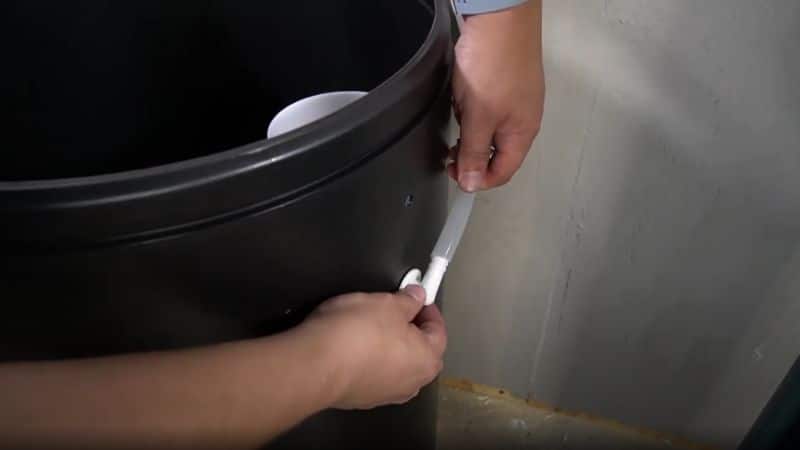
Step 2: Install Overflow Grommet
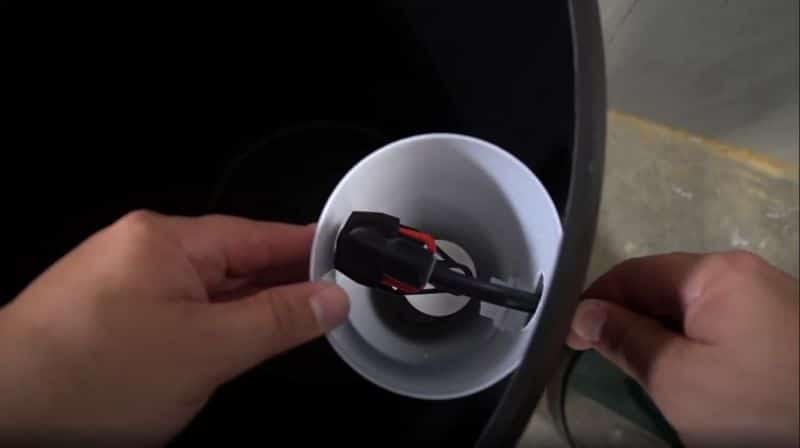
If your salt-based water softener uses a brine tank overflow grommet, install this first.
At the back of the brine storage tank sidewall, you’ll find a diameter hole where the grommet and elbow should be placed.
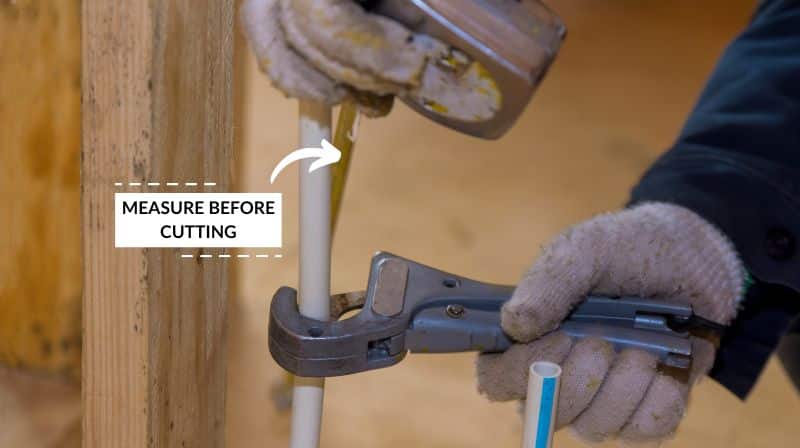
Step 3: Cut Into Pipe
Next, use a pipe cutter to cut out a section of the pipe in your water supply. Ensure you take careful measurements beforehand.
Sand the edges of the cut pipe and use a lint-free cloth to remove any dust and catch leaking water with a bucket or container.
Step 4: Attach Bypass Valve
Your next task is to install the bypass valve.
To install the bypass valve, use silicone to grease the O-rings and insert the valve into the softener valve, pushing it as far as you can. It should click or snap into position.
A bypass valve lets you shut off the cold water in your plumbing when you’re performing maintenance on your softener. In some regions, it’s illegal not to have a bypass valve that can be used to divert your water in an emergency. We strongly recommend buying a bypass valve if your softener doesn’t come with one.
📌 Some water softening systems have built-in valves that don’t need to be installed. Consult your user manual to check what type of valve your softener uses.
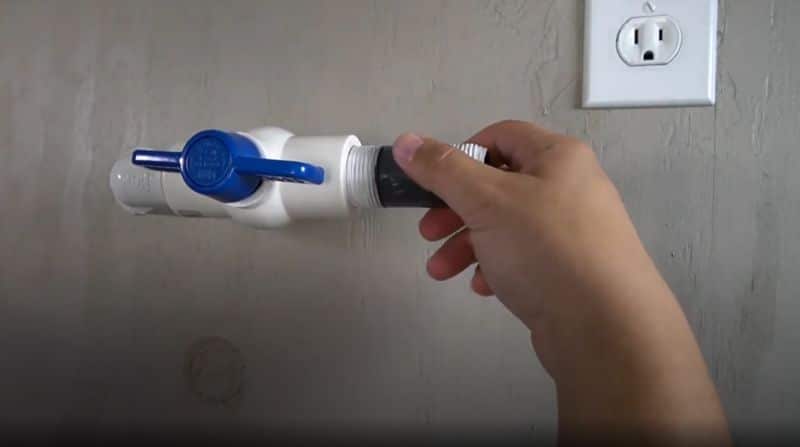
Step 5: Connect Outlet & Inlet Ports
Next, attach the inlet and outlet ports to your water softener’s inlet and outlet.
Don’t mix up the inlet and the outlet sides, as this will prevent your water softener from being able to produce soft water.
You can choose either hard piping or flexible tubing to connect to the ports. Hard piping doesn’t need additional adaptors, but flexible tubing is typically much quicker and easier to set up, and you won’t need to take your soldering gun out for the job.
Make sure to use plenty of plumber’s tape to seal the connections.
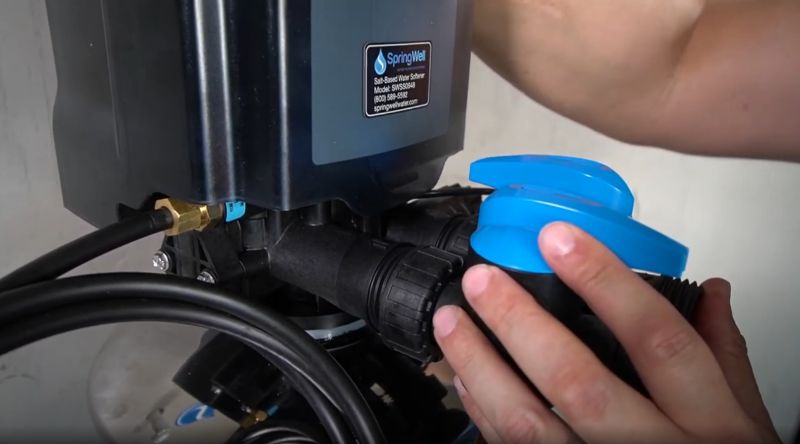
Step 6: Connect Drain Line
Even the best salt-based water softeners produce drain water during regeneration, and for that, they require a drain connection.
To install the drain line, connect the unit’s drain valve to the drain hose, and attach flexible tubing to the brine tank and control valve. Use hose clamps to secure the drain hose, then connect the bottom end of the hose to a suitable drain and secure it in position.
Don’t insert the drain line fully inside the drain, as this increases the risk of back-siphoning. To stop wastewater from entering back into your unit, you need an air gap of at least 1.5 inches.
Purchase an air gap fitting for the job and consult the manufacturer’s guidelines carefully during installation.
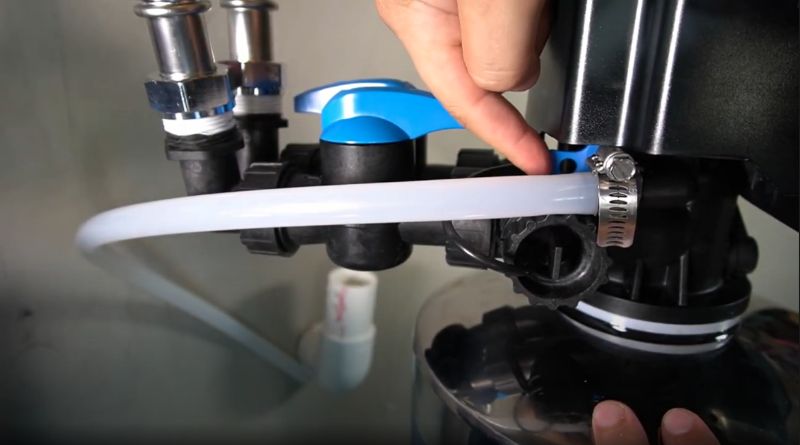
Step 7: Set Up Overflow Connection
To prevent the brine tank from overflowing, your water softener should come with an overflow connection. Locate the overflow valve and attach the hose, securing it in place with a clamp.
Direct this hose to the nearest suitable drain and secure it down. Check whether you need an air gap. If so, you will need to buy another fitting.
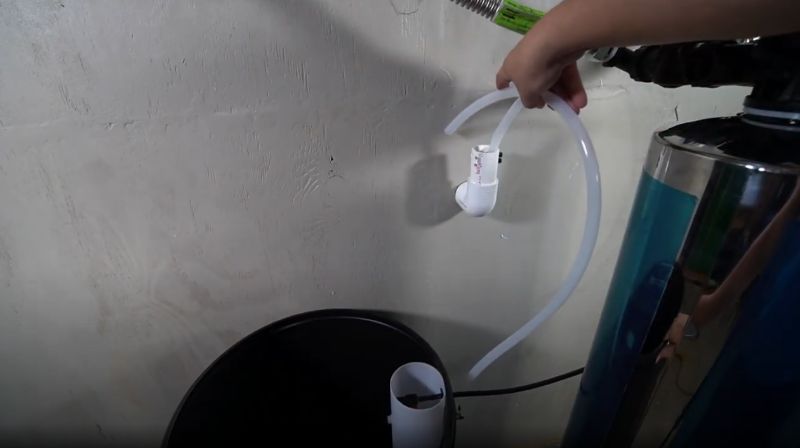
Step 8: Connect Brine Line
If you have a side-by-side water softener, consisting of a brine tank and a resin tank (or mineral tank), a brine line is needed to direct salty water flow into the resin bed. Follow the manufacturer’s guidelines to install this line.
Step 9: Post-Installation
If you have an electric water softener, plug the unit into a GFI outlet. Next, fill the brine tank and program the unit’s settings.
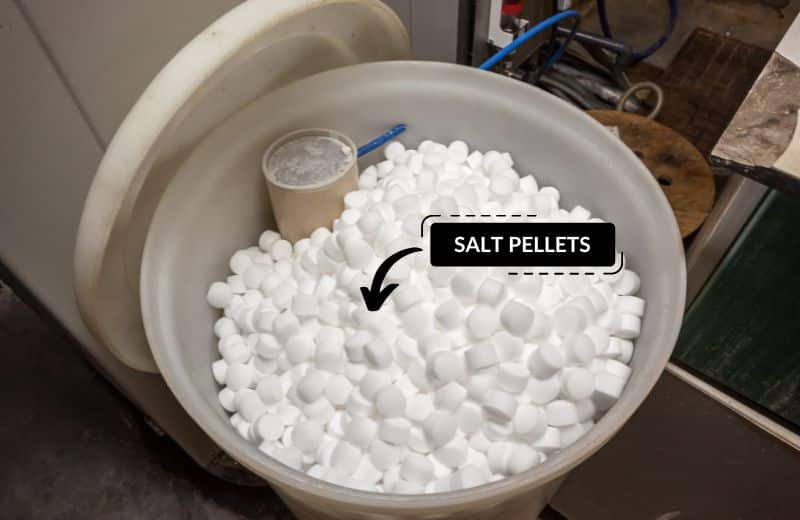
Place the softener brine well inside the brine tank, then pour water softener salt into the tank until it’s about two-thirds full.
Check whether your water softener needs to be sanitized before use. The guidelines for sanitizing should be outlined by your manufacturer.
Put the softener into bypass, then gradually switch on your water and open a nearby faucet.
If there are no leaks, allow a couple of minutes for trapped air to be released. Then, slowly open your water softener’s bypass valve to allow water to make its way into the tanks. You’ll hear a noise as air leaves the unit through the drain. Once the noise has stopped, open the valve all the way.
Switch your water heater back on and check your plumbing, fittings, connections, and pipes for leaks. Plug the water softener in, program a regeneration cycle, and input your water usage/water hardness settings into the control valve. The softener will now be ready to produce softened water in your home.
And there you have it: that’s how to install a water softener.
🔂 How to Replace an Old Water Softener
Replacing an old water softener is easier than installing a new system. You shouldn’t need to plumb the system into your water line because you’ll already have a dedicated setup for your existing softener.
Simply unplug your old water softener and put it into bypass mode. Unhook it from your plumbing, then follow the steps above to install the new system, skipping step 3 (and step 4, if you already have a working bypass valve).
When you get a moment, drain the old water softener with a wet vac or tip it over a drain until the brine tank is empty. Dispose of the water softener and resin separately.
This article explains how to remove a water softener correctly.
❔ Frequently Asked Questions
What does installing a water softener system cost?
The average cost to install a water softener is $300 to $500 USD – so it’s fairly expensive. You may have to pay upwards of $1,000 if your plumbing system isn’t set up for easy water softener installation. In the best-case scenario, your home will have a plumbing loop that’s easy to access, reducing the costs involved in the installation process.
How long does water softener installation take?
It takes about 4-6 hours to install a water softener, depending on the complexity of the job. To replace an existing water softener, you’ll only need 1-2 hours. Your DIY experience and know-how, the complexity of the unit itself, and the accessibility of your home’s plumbing system all affect how long installation takes.
Is installing a water softener hard?
For homes with accessible plumbing, installing a water softener isn’t hard – it’s just a lengthy, fiddly process. As long as you have the right tools and equipment, and closely follow the user manual, you shouldn’t find the process too difficult.
If your home has old plumbing, it may be trickier to cut the main line and connect the water softener to your water supply.
Can I carry out DIY installation with no previous handy experience?
Yes, you can install a water softener even if you have limited DIY experience. Just make sure to look for a water softener that has clear, easy-to-understand instructions for installation. Ask the manufacturer to see the user manual in advance if it isn’t available to download online.
If you’re not particularly handy and you can’t get your head around the installation process, we would advise considering hiring a licensed plumber to avoid costly mistakes.
Who can install my water softener?
If you can spare the extra installation cost of getting a professional to hook up your water softener for you, you have several options.
Most retailers like Sears and Home Depot provide an installation service at an extra fee. However, buying a water softener from a hardware store is often more expensive than purchasing the same one online.
The second option is to hire a licensed plumber. This means you can shop around in your local area, compare customer reviews, and consider cost.
