Considering buying a property with a well system and want to learn more about how wells work? Or do you already own a well, but don’t know much about the various components that keep your well in operation?
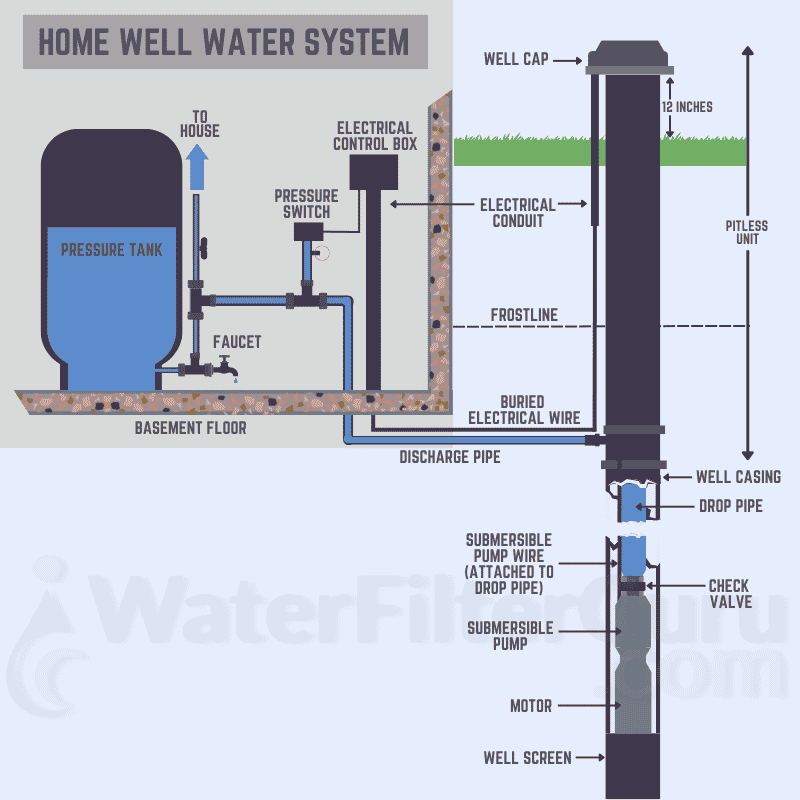
Check out our water well components diagram to visualize how a well system works. We’ve illustrated and described the various components in this post.

🧱 Well Components Labelled
1. Check Valve
Check valves, located at the top of the well pump, are extremely important components that maintain the quality and durability of the other well components. A check valve ensures that water flows freely in one direction and prevents backflow of water into the pump. Check valves are found on all submersible pump applications in a well system.
2. Well Pump
The well pump, also known as the water pump, is one of the biggest and most important components of a well system. The pump draws water from the well aquifer, where it is held in a storage tank until it’s needed. There are two common types of pumps: below-ground submersible pumps (which push water upward) and ground-level jet pumps (which pull water upward).
The type of well, the well depth, and your daily water requirements dictate which pump is best suited for your needs.
Related Articles:
- How Long Do Well Pumps Last?
- Ultimate Guide to Priming a Well Pump
3. Well Casing
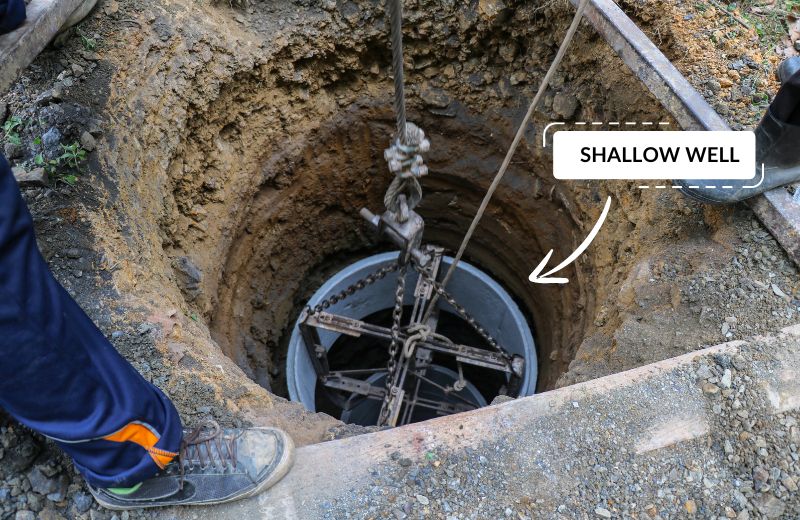
Well casing is the wall of the well, typically made from PVC, stainless steel, or carbon steel. The casing is designed to protect the well from contamination from soil seepage. The type of material used for your well casing depends on the original owner’s budget, the groundwater quality, and the local geologic formation.

4. Well Screen
The well screen is a sieve-like component on the end of the water pump, where water from the aquifer is drawn into the pump. Well screens prevent large particles of sand, dust, gravel, soil, and other debris from entering the well system, reducing abrasive damage to the pump and your home’s plumbing.
5. Brass Rope Adaptor
A brass rope adaptor is a brass barbed end that connects the metal threaded pipe to the polyethin pipe, attaching the submersible pump to the pitless adaptor. The rope comes with an eyelet, which secures the pump in the well.
6. Stainless Steel Clamps
Safety clamps, often made from stainless steel, connect the insert fittings or torque arrrestor with the pipe.
7. Splice
The splice is the waterproof electrical connection between the submersible pump drop cable and the motor leads.
8. Safety Rope
The safety rope attaches to the well head and the submersible pump. The main function of the rope is to prevent the pipe from separating and causing the pump to be lost at the base of the well.
9. Torque Arrestor
Torque arrestors protect the well components and pump from damage when the torque kicks in. The torque arrestor, installed directly above submersible pump installations, is almost like a shock absorber in well water systems, preventing the pump motor start-up torque from forcing the pump against the well casing.
10. Cable Tie and Cable Guard
The cable tie connects the cable to the drop pipe, and the cable guard prevents the submersible cable wires from scraping against the inside of the well casing. There are two common cable guard styles: snap-in and self-clamping.
11. Brass Insert Fitting
The brass insert fitting connects the pitless adapter’s pipe thread and poly pipe.
12. Pitless Adapter
A pitless adapter is attached to the well casing below the frost line and provides a frost-proof seal between your home’s water line and the casing. This device is sanitary and watertight, and prevents water from freezing. Pitless adapters give you easy access to the water pump and well components with no need to dig around the well.
13. Well Cap
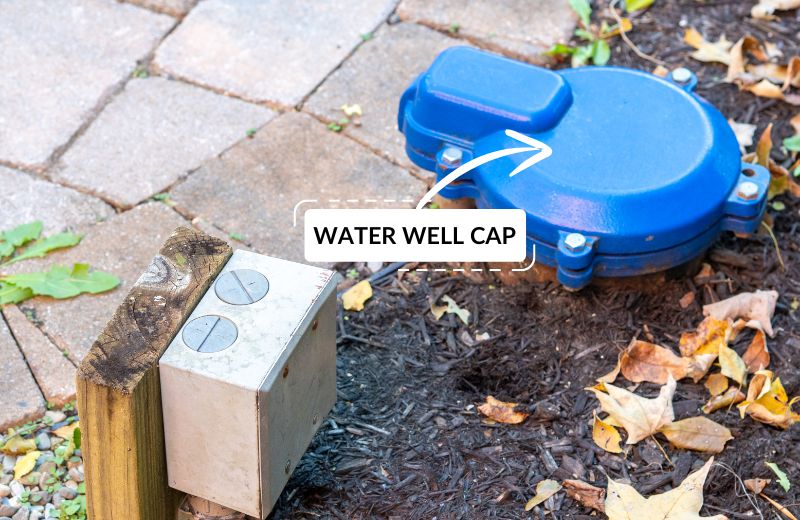
The watertight well cap prevents debris, insects, small animals, and animal waste from contaminating the well from ground level. Well caps use vents to allow gases to escape the well, enabling the well to “breathe”. The well cap’s inner gasket is compressed against the outside of the well system casing, preventing water from getting in. This cap can be easily removed when the well needs to be serviced.

14. Check Valve
A check valve, installed near the pressure tank inlet, holds water pressure inside the well when the pump shuts off. This valve also extends the lifespan of the well parts and prevents motor failure by reducing the risk of water hammer, backspin, and upthrust in the pump.
15. Tank Tee
The tank tee attaches the water line from the pressure tank to the pump, and the service line from your property to the pressure tank. This fitting comes with multiple accessory ports and connections, enabling a single port to do the same job as several fittings. The provided taps accept pressure switch, relief valve, drain valve, pressure guage, snifter valve, and so on.
16. Drain Valve
The drain valve allows for easy draining of the well water system, providing automatic drainage of pipe water lines, typically when pressure drops below 10 or 5 PSI.
17. Relief Valve
The relief valve, or pressure relief valve, protects the well water system from pressure build-up, and is used in all scenarios where the pump could provide pressure that exceeds the system’s maximum rating.
18. Pressure Tank
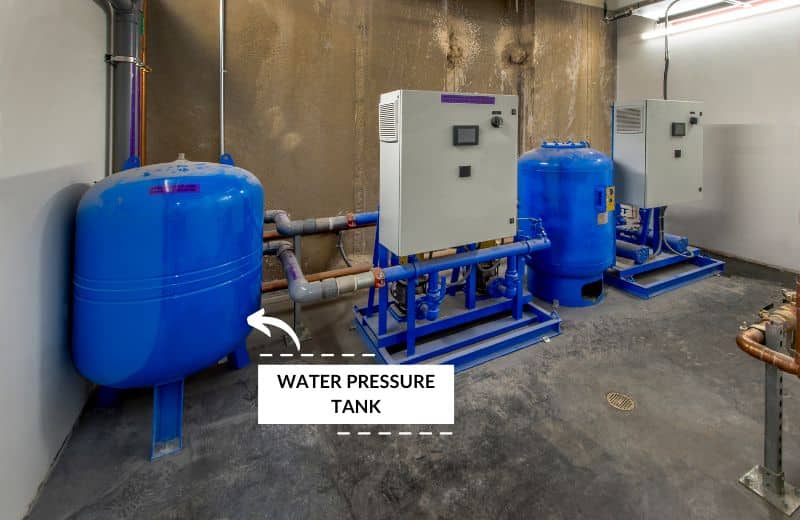
The pressure tank stores water that has been drawn from the well by the pump. This tank maintains a pressurized environment, which enables water to speedily flow into your plumbing and pipes. The role of the pressure tank is to reduce the frequency of pump cycles, preventing the pump from cycling on and off every time water is needed. There are various sizes of pressure tanks, made from several different materials.

19. Pressure Gauge and Pressure Switch
The pressure gauge monitors the pressure tank’s water pressure. The pressure switch signals the pump to switch on when pressure in the water tank drops below a certain reading (usually 40 PSI). The switch ensures that the tank always maintains a certain water pressure.
20. Lightning Arrestor
The lightning arrestor is designed to protect pump motor and controls from voltage surges caused by power line interference, lightning, and switching loads.
21. Ball Valve
The ball valve acts as a shutoff valve on the water supply pipe leading into your property. If you need to close off the supply of water to your home, close the valve to rotate the ball inside the valve.
22. Water Filter
Most well contractors recommend installing a water filter downstream of your well water system, which removes heavy metals, rust, sediment, and other common well contaminants from your supply water.


Where does the swage go??
We have a well system but we rent,… Is not sewage a part of a well system? I assume it is.
Is there two differing sewage lines?
Thank you for the clarity.
Hey Kren, great question!
There are typically 3 options folks on private wells use for sewage disposal:
Hi, I just bought a property that has a well. The house is on county water, but I’d like to use the well for irrigation. The previous owner said the well still works, but I’m afraid to turn it on without someone who knows more than me. Will I potentially cause damage if I just turn it on? Any recommendations? Thanks
Id recommend contacting a licensed well driller in your area to provide consulting on this!