Want to get virtually the same performance from your water softener in a decade’s time? Then you’ll need to make the time to clean it every now and then.
Luckily, cleaning a water softener is easy enough to do yourself. You won’t need to pay for a professional to do the job for you – and cleaning supplies cost less than $10.
Table of Contents
🤔 Why Clean a Water Softener?
Water softeners are pretty independent, but they still need to be cleaned from time to time to prevent a buildup of impurities.
Some of the reasons to clean a water softener system are:
- To prevent dirt and sediment from collecting inside the brine tank
- To prevent early fouling of the resin bed
- To avoid issues associated with salt mushing and bridging
- To keep the water softener system working efficiently
- To increase the lifespan of the resin
- To maintain the system’s components and reduce the frequency of repairs
There are two main cleaning tasks for a water softener: cleaning out the resin tank and cleaning out the brine tank. You should also wipe down the outside of the tanks to prevent dust and dirt buildup.

🧽 How to Clean a Water Softener Resin Tank
You should aim to clean out a resin tank once per year, or when you carry out your water softener service.
If you have very hard water or water with a high iron or manganese content, you should definitely aim to clean out the resin bed at least once a year to prevent fouling. Even if your water looks clean, it could be depositing a whole host of contaminants inside the resin.
Use a resin cleaning product, otherwise called a rust remover or a rust stain remover, to clean the resin beads. Make sure the product is designed for, or suitable for, using in water softeners.
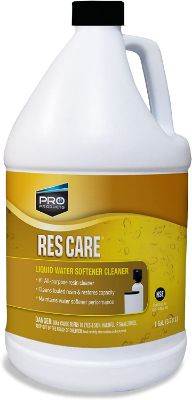
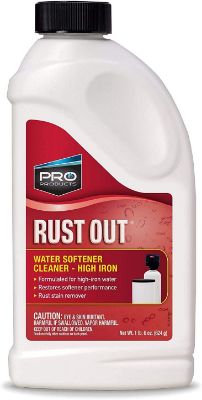
Different resin cleaners have different cleaning instructions. Depending on the product you choose, the steps for cleaning the resin beads will be something like this:
- Dissolve the cleaner in water according to the manufacturer’s instructions.
- Add the cleaner-water mix to the water softener’s brine tank.
- Manually program the water softener to perform a regeneration cycle.
- The cleaner will clean out the resin bed as the water softener regenerates.
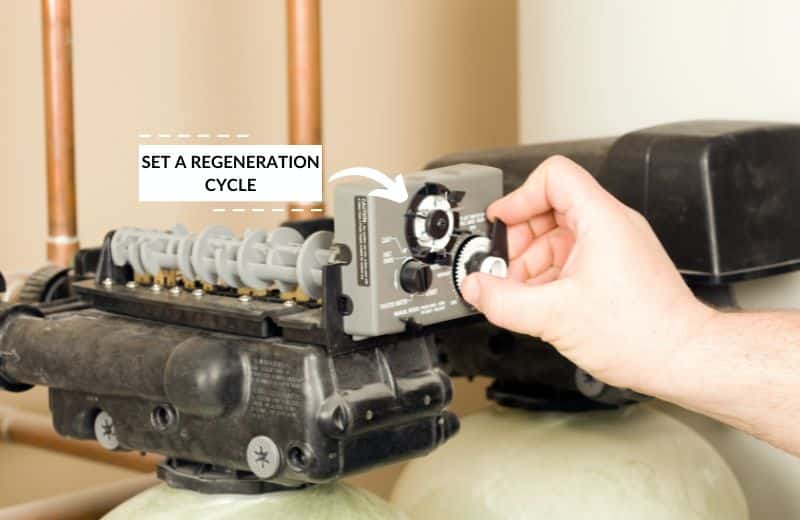
Carefully check the instructions for the resin cleaner. Some cleaners need to be added when the brine tank is full of salt, while others can only be used when there’s not a lot of salt in the tank.
You can buy specialty resin cleaner dispensers if you don’t want to remember to clean the resin bed yourself. These dispensers sit inside your brine tank and add measured amounts of solution to the system every day.
🧼 How to Clean a Water Softener Brine Tank
The brine tank requires more effort to clean than the resin tank, and may need to be cleaned more frequently.
Most brine tanks will need to be cleaned every 6 to 12 months. If you use low-purity salt, like rock salt, you may need to clean the tank more frequently to remove a buildup of dirt. If a salt bridge forms in the tank, you’ll need to forget your cleaning schedule and clean the tank there and then.
Let’s look at how to clean a water softener brine tank, step by step:
1. Wait Until the Salt Level is Low
It makes sense to clean the salt tank when the sodium levels are low. If you’ve only just added salt pellets to the tank, you’ll only end up wasting salt if you empty out the tank for cleaning.
Wait until there’s not a lot of salt left and the brine tank is light enough to easily lift. This means you’ll have less salt to scoop out of the tank, and you’ll be able to see how much dirt has built up around the bottom of the tank.

2. Shut Off the Water
When you’re ready to get started with cleaning, shut off the water by turning the water softener’s bypass valve.
This will divert water away from the system and make it safe for you to access the brine tank while it’s not in operation. You’ll still be able to use unsoftened water in your home if you need to.
3. Drain the Brine Tank
Remove the grid plate and brine well from the bottom of the brine tank. Drain the tank by scooping out the water with a large bucket or vacuuming the water with a wet vacuum.
Once the tank is light enough to carry, detach it from your water supply and pour the rest of the brine solution down the drain.
Alternatively, set your water softener to perform a regeneration cycle, then skip the rest of the cycle once the brine tank has been emptied.

4. Clear the Remaining Salt
Once the water is gone, you’ll be left with a layer of sludge or salt at the bottom of the tank.
Use a shovel to scoop the sludge out of the tank, being careful not to scrape the tank’s walls. Bash hard, stubborn pieces of salt that are stuck to the sides with a broom handle.
5. Wash Out the Tank
Place the tank in your yard and use a hose to rinse out the tank. This will remove any remaining brine or salt, as well as the easy-to-lift sediment from the sides of the tank.
Try to get the tank as clean as possible with the hose, which will make your job easier in the next stage of cleaning.
6. Scrub the Tank with Detergent
Mix a couple of drops of dish soap with two cups of water in a bucket. Dip a non-abrasive sponge in the solution and scrub the insides of the tank with the soapy water.
If you notice that the tank has mold that won’t budge, apply a natural mold-removal treatment.
7. Rinse and Refill the Tank
Once you’ve scr\ubbed the tank from top to bottom, rinse the tank with water from your garden hose to clear away the suds. Dry the insides of the tank with a towel, or let the tank dry naturally outside.
Reinstall the tank and refill the salt pellets until the maximum fill line. Turn the bypass valve so that water flows back into the system.

8. Set the System to Perform a Manual Regeneration Cycle
Set your softener to perform a regeneration cycle overnight after you’ve cleaned out the water softener tank.
🚱 Cleaning Brine Tanks After a Salt Bridge has Formed
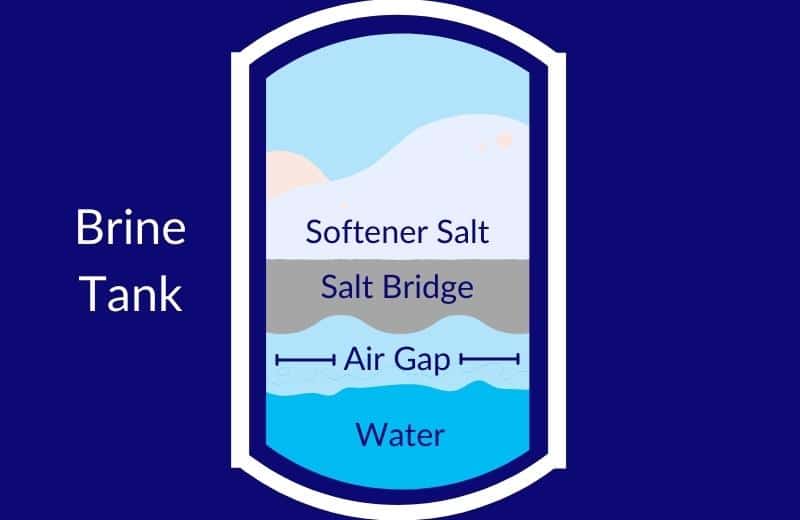
A salt bridge is a hard, crusty layer of salt that forms over the remaining salt in the brine tank. Salt bridges can be deceiving, giving the impression that the tank still contains a lot of salt, when the space beneath the bridge might be completely empty.
You can’t simply add more salt over the salt bridge. Instead, the salt bridge will need to be removed, and the tank cleaned, before you can refill the salt level.
Here’s how to clean a brine tank to get rid of salt bridges:
- Identify the salt bridge. Salt bridges are hard, tough, and compacted. If you haven’t topped up your salt pellets in a while but the tank still looks full, use the back of a broom to gently press the top layer of salt. If the salt won’t move, you probably have a salt bridge.
- Break up the salt bridge. Press down harder with a broom handle until the salt bridge breaks. Be careful when removing salt bridges from the sides of the water softener tank – you don’t want to damage the tank. Pour warm or hot water onto the bridge if the salt is fully compacted.
- Use a small container or net to fish the floating salt chunks out of the water.
- If you plan to clean the brine tank after removing salt bridges, follow the steps above to drain, rinse, scrub, and refill the tank.
🧴 How to Clean the Outside of a Water Softener
The resin beads and brine tank should get the most attention, but don’t forget to keep the outside of your water softening system clean.
Most water softeners are installed in an out-of-the-way location, like in a cupboard, a basement, or a garage. It’s common for dust and dirt to accumulate in these locations, potentially damaging your water softener’s components.
Dip a cleaning cloth in a bucket of warm, soapy water and carefully wipe around the system whenever you notice dust or dirt building up.
📥 Reducing the Frequency of Water Softener Cleaning
Not many of us enjoy cleaning. Ultimately, you can’t avoid cleaning your water softener altogether. But if you want to reduce your water softener cleaning duties, there are a few things you can do:
Filter Your Water Before Softening
High iron, manganese, and chlorine levels are known to damage the resin bed in a water softener.
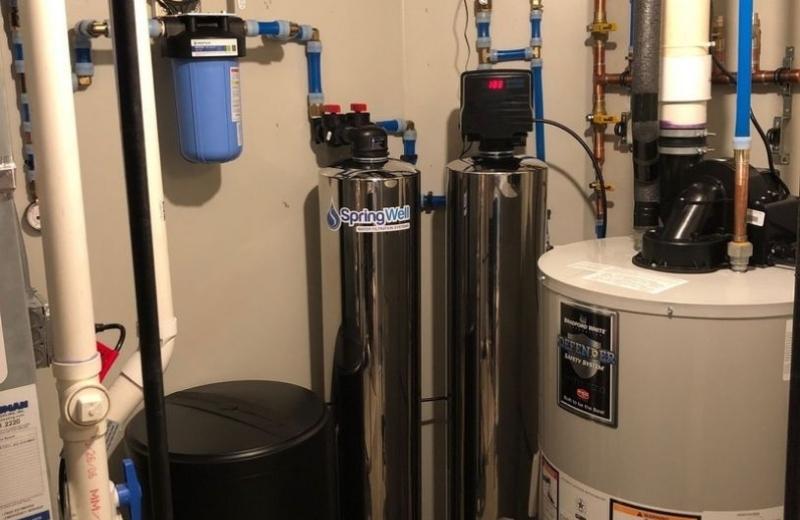
If you want to clean the resin less frequently, and enjoy a longer-lasting resin, install a whole house water filter that removes these harmful contaminants before water enters the softener.
Use High-Purity Salt
The purer your softener’s salt supply, the fewer impurities it contains. The fewer impurities in the salt, the more evaporated salt is produced, and the less sediment is left behind. High-purity salt is cleaner, so it doesn’t make your brine tank as dirty.
Set the System to Regenerate On Time
If your water softener doesn’t regenerate as frequently as it should, it won’t flush out the resin as often as needed. The result? The resin will accumulate dirt, iron, chlorine, and other damaging contaminants, leading to faster degradation. Make sure your water softener regenerates according to your household water usage and your water hardness.
🧠 Water Softener Cleaning FAQs
God some more questions about the how, when and why of cleaning a water softener? We’ve answered your most common FAQs below.
How often should you clean a water softener?
The brine tank should ideally be cleaned once every 6-12 months, and the resin tank should be cleaned once a year. Consult your user manual to read your manufacturer’s recommendations for your water softener, or reach out to customer service for more information.
How much does it cost to clean a water softener?
It costs less than $10 to clean your water softener using a few basic cleaning supplies. If you decide to pay a professional to clean your water softener during a service and inspection, the cost is between $40 and $100.
Does a water softener need to be cleaned?
Yes. Water softeners are in constant daily use, and their 24/7 contact with water eventually leads to a buildup of impurities inside the tanks. Water softeners should be cleaned regularly to keep them in operation.
Cleaning a water softener brine tank also helps you to notice issues inside the tank, like salt sludge at the bottom of the tank (known as salt mushing) and salt bridges. It’s not always easy to spot these issues during a salt refill, but if you’re emptying out the entire tank, they’ll quickly become obvious.
What’s the difference between cleaning and servicing a water softener?
Cleaning a water softener involves washing out the brine and resin tanks with soap, water, household bleach, or a special cleaning solution. Servicing a water softener involves checking that all the components are working as they should, checking water quality, checking electrical safety, and identifying any faults.

How often should a water softener be serviced?
This depends on your water softener, but most manufacturers recommend that you service your system once a year. The user manual should provide more information on how to service your water softener.
How often should you change the resin in a water softener?
Even with regular cleaning, your water softener resin will expire eventually. The lifespan of the resin depends on the type of resin you buy, and from which brand. 8% crosslink resin has a lifespan of about 10 years, while 10% crosslink resin lasts for up to 20 years. Consult your user manual or contact the manufacturer for more information about the included resin.
Is my water softener brine tank dirty?
If your water softener brine tank is dirty, you’ll notice a buildup of brown or gray sediment around the inside of the tank. A buildup of dirt is common, especially if you use softening salt with less than 99% purity, as the dirt and impurities mixed in with the salt will end up collecting in the tank.
The good news is that this dirt won’t get into your water, as it can’t dissolve with salt. Cleaning out the brine tank will get rid of the sediment.
Can you use bleach to clean a water softener?
Yes. Bleach can be added to the brine tank as a sanitizer – just add 2 ounces of bleach to every 3 gallons of water. Leave the bleach solution for up to 30 minutes, then scrub the inside of the tank and dump the solution. Rinse the tank with clean water, then dump again to get rid of the remaining bleach water, before adding new salt to the tank.
Does vinegar clean water softener resin tank?
Yes, you can use vinegar to clean out your resin tank. This is a good option if you prefer not to use harsh chemicals like bleach. Just follow the same instructions for cleaning the tank with bleach. You can also use a vinegar-water mix to clean out the brine tank.
How do I know if my water softener resin is bad?
If your water softener resin is bad, you’ll notice that your water softener is using salt at its usual rate, but your water isn’t soft. Try cleaning the resin beads following the steps in this guide. If you see no improvement, it’s a sign that your resin has completely checked out and needs to be replaced.

Can an unclean water softener cause burns on the body during showering?
Sounds more like an allergic reaction, but I would advise consulting with your healthcare professional. Next step, get your water tested by a certified third party lab.