For the most part, whole house water filters work their magic behind the scenes, without your input.
But every now and then, they’ll need a bit of maintenance to keep them working at their best.
There are two types of whole house water filters:
- Cartridge filter systems
- Tank-based filter media systems
In this guide, we’ll be sharing how to change the filter cartridges or filter media in each of these systems. We’ll also answer your common questions about how often you’ll typically need to change a whole house water filter, and what happens if you don’t.
Table of Contents
- 📤 How to Change the Filters in a Whole House Cartridge Filtration System
- 🔁 How to Change the Filter Media in a Whole House Tank Filtration System
- 📅 How Often Should You Change a Whole House Water Filter?
- 📑 The Consequences of Not Replacing a Filter
- 🆚 Replacing A Whole House Water Filter: DIY Vs Professional
- ⚠️ What to Do if you Can’t Remove the Water Filters
- 🧠 Whole House Water Filter Replacement FAQ
📤 How to Change the Filters in a Whole House Cartridge Filtration System
Here’s how to change the filters in a traditional whole house cartridge-based water filter system.
You will need:
- Replacement water filter cartridge
- Filter wrench
- Empty bucket or container
- Soapy water and cleaning supplies (optional)

Instructions:
- Shut off your water: Find the valve at your main water line and shut off your water supply. If your whole house water filter comes with its own shut off valve, you can switch this off instead.
- Relieve water pressure: Switch on all the faucets around your home to release pressure and allow water to leave the pipes. Close your home’s outlet valve (if you have one).
- Activate the pressure release button: Press the pressure release button on the filter housing to allow pressure to escape from the system. This will make it easier to change the water filter cartridges.
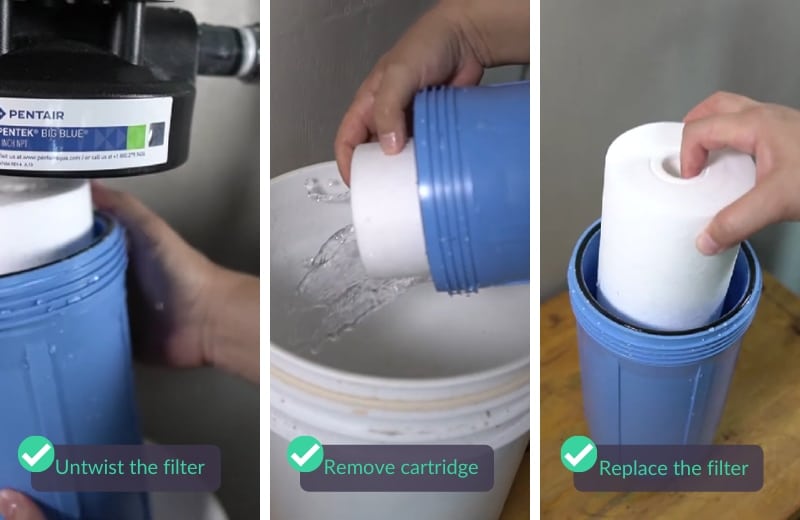
- Untwist the filter: Use the filter wrench to untwist the first filter canister from the housing. Place an empty bucket beneath the system to catch water that escapes from the housing.
- Remove the cartridge: Tip the canister to remove the old water filter cartridge. If the filter is stuck, give the canister a few taps to loosen it. If you have an o-ring, be sure to place your fingers on it to prevent it from coming off during this process. Put the old filter to the side, ready to responsibly dispose of later.
- Clean the canister: If you have time, clean out the inside of the filter canister with warm, soapy water to get rid of any sediment or debris. Rinse with clean water, then wipe the inside of the canister dry with a paper towel or cloth.
- Check each o-ring: Check the o-rings for damage, and replace if necessary. Lubricate the o-rings with silicone grease and put them carefully back in place.
- Replace the filter: Slot a new filter cartridge inside the filter canister and hand-screw the canister back onto the filter housing, being careful not to over-tighten.
- Check for leaks: Gradually turn on your water supply. Check for leaks around the filter housing. If you notice leaks, turn your water back off and tighten the connections or add more plumber’s tape.
- Repeat the above steps: Repeat the process with all the other sediment and carbon filters in the system that need changing.
- Turn on the water: Turn on your water supply completely and allow water to flow out of several faucets to flush the new filters according to the user manual.
- Close the faucets: Close the faucets when your water pressure and flow have returned to normal.
🔁 How to Change the Filter Media in a Whole House Tank Filtration System
Here’s how to change the media in a tank-based whole house water filter.
You will need:
- Replacement carbon media
- Any other required media (such as a flex bed and KDF media)
- Funnel (optional)
- Replacement tank head (if needed)
- Items for flushing and soaking the media (provided by the manufacturer)

Instructions:
- Turn off the water: Switch off your water supply and relieve pressure by opening several faucets in your home.
- Bypass water: Switch the bypass or inlet valve to divert water away from the water filter.
- Remove the tank: Remove the tank completely from your water line. Depending on the type of system, you may be able to simply unscrew the tank from the connections, or you may need to use tools to detach the system.
- Turn the water back on: Double-check that the bypass valve is preventing the flow of water to the system, then turn the water supply back on.
- Remove the media: Take the tank outside and remove the tank’s cover/sleeve. Unscrew the tank head and carefully tip the tank on its side (with the help of somebody else, if the tank is too heavy for you) to wash the old carbon media down your outside drain. The carbon media is non-toxic.
- Wash out the remaining media: Lay the tank on its side on a raised surface and fire water from a garden hose inside to flood the tank with water, allowing the leftover carbon media to spill out.
- Repeat rinsing: Repeat this rinsing and flushing process until the water runs clear to completely remove all the media.
- Add the new media: Open the bag containing the new media and carefully pour the media into the tank. Some carbon media replacement kits come with a funnel to make the job easier. You could also use your own funnel if you have one.
- Check the order of the media: If you have multiple media, check the manufacturer’s instructions to know the order that the media should be added.
- Screw on the tank head: Return the tank head, or, if the manufacturer has given you a new one, screw the new tank head in place. Put the tank’s sleeve or cover back on.
- Leave the media to soak: Check your user manual for instructions on soaking the media. Some media needs to be soaked for up to 48 hours before the system can be reinstalled at your water line.
- Rinse the media: After the soaking period has elapsed, the media in the tank will need to be rinsed. Again, follow your user manual to know the correct way to do this for your system.
- Return the tank: Return the filter system to its location at your water line and screw or attach it back in place.
- Flush the tank: Slowly open the bypass on the bypass valve to allow water to flow back into the tank. Turn on several faucets to allow the water to flow through the system for around 10 minutes, or as noted in the manufacturer’s instructions.
- Check for leaks: If you notice leaking around the tank head, close the bypass valve and tighten the head, then open the valve again.
- Switch off your faucets: When water pressure has resumed, switch off your faucets.
📅 How Often Should You Change a Whole House Water Filter?
The exact lifespan of the filters in your system depends on several factors, including the manufacturer, the filter materials, and the type of system.
Typically:
- A whole house sediment filter lasts for 3-12 months
- A whole house carbon filter cartridge lasts for 6-9 months
- Post-filters last for 9-12 months
- Carbon media (for tank-based systems) lasts for between 3 and 5 years or longer depending on the chlorine levels
These are just general guidelines based on the average filter lifespans of the whole house filter systems we’ve tested. Consult your user manual to find out exactly how often each filter cartridge needs to be replaced.
A good idea is to install a pressure gauge on either side of the system. When the pressure drops significantly after water has traveled through the filters, it indicates that it’s time to replace a filter cartridge.
📑 The Consequences of Not Replacing a Filter
It’s easy to forget to change a whole house water filter on time. If you don’t replace the filters when they reach the end of their lifespan, there are several consequences that follow:

- The filters will become very clogged, slowing down water flow
- The filters won’t have the capacity to hold any more contaminants, so they’ll stop being effective
- Your water supply will be no cleaner when it leaves the filter than when it enters it
- Bacteria will start to build inside the filters, potentially making you sick
- Your household appliances will no longer be protected from contaminants, and their efficiency may decrease
- Your water will taste, smell, or look unappealing once more
You should make sure to replace every water filter cartridge in your whole house filter at least once a year, and replace filter media every 5 years or so to avoid these consequences.
🆚 Replacing A Whole House Water Filter: DIY Vs Professional
If you have a cartridge-based whole house water filter, we strongly recommend replacing the filter yourself.
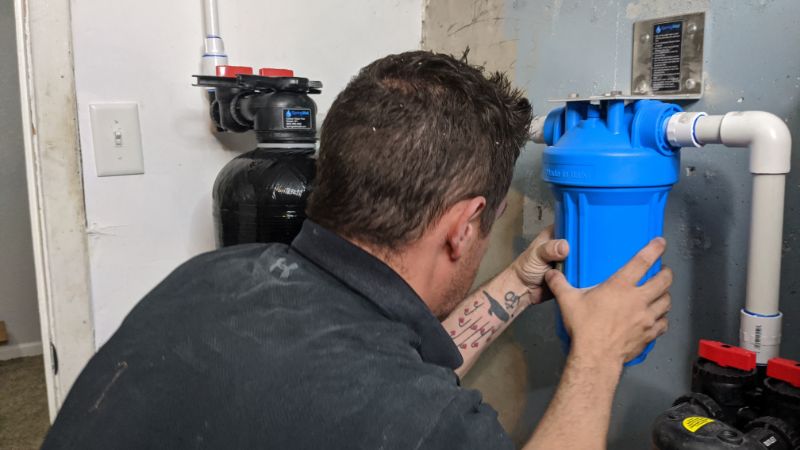
All you’ll need to do is unscrew the water filter housing to remove the old filter, and slide the filter replacement in its place. You might also need to lubricate an o-ring or two with clean silicone grease, too, but it isn’t hard or confusing work.
Replacing the media in a tank-based whole house water filter can be more challenging.
The filter change process involves tipping the tank and soaking the media for up to 48 hours. You should be able to follow the instructions just fine, but if you have mobility issues, you should find somebody to replace the media for you.

This doesn’t necessarily need to be a professional. Your neighbor or a family member could help – but some people get peace of mind from asking a qualified plumber or handyman to do the job for them. The cost of a professional media change is about $50-$100, depending on whether your plumber charges per hour or charges a flat fee for the service.
⚠️ What to Do if you Can’t Remove the Water Filters
A common issue with cartridge whole house water filter systems is stuck filters. When you come to do a filter change, you might find that your filters are stuck on the filter bracket, and you can’t remove them.
This could be caused by too much pressure in the system. Try pressing the red pressure relief button to ease the pressure.
A hard, cracked, or broken o-ring, or sediment on the inside of the filter canister, could also be causing your filters to stick.
If you need advice on how to unstick a stuck filter in your whole house water filter system, follow the step-by-step guidance in this article.
🧠 Whole House Water Filter Replacement FAQ
Keen to learn even more about changing the filters in your whole house system? We’ve covered your most pressing questions in this section.
How do I change the water filter in my house?
To change a water filter, you should switch off your water supply, then open the filter housing, untwist the old filter, and slow the replacement filter in its place. Switch your water supply back on, check for leaks, then you’re good to go.
How long is a whole house water filter good for?
- Cartridge filters are usually good for 3-12 months, depending on the filter type.
- Filter media usually lasts for between 3 and 5 years.
The unit itself should last for at least a decade, as long as you follow the manufacturer’s instructions for cleaning and general maintenance.
How do you know when to change your water filter?
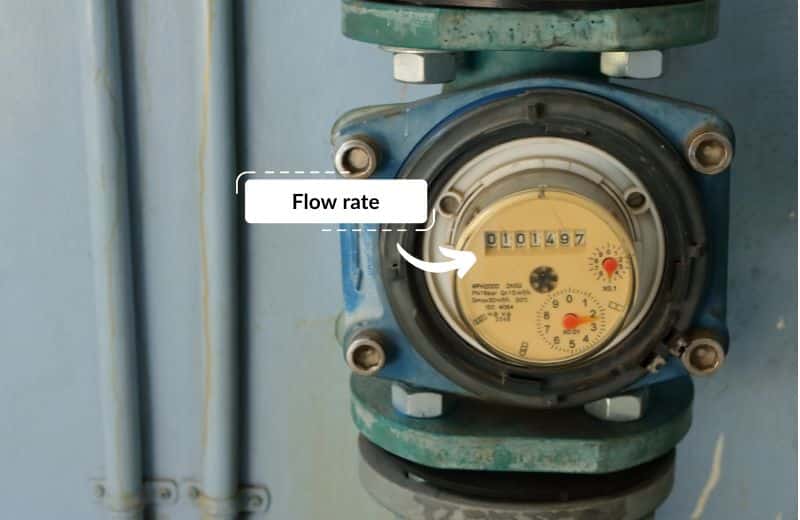
The easiest way to know when to change your water filter is to monitor flow rate. When flow rate begins to slow, it tells you that one (or several) of the filters has become so clogged that it can’t allow water to pass through at the usual speed.
Relying on flow rate alone isn’t ideal. Make a note in your calendar to replace your filters according to the manufacturer’s guidelines, and consider installing a pressure gauge to monitor your water pressure before and after the filter.

How often should a whole house carbon filter be changed?
A whole house carbon filter cartridge should be changed once every 6-9 months, or as recommended by the manufacturer, or when your water flow slows significantly. Whole house carbon media should be changed every 5-10 years, or as recommended by the manufacturer.
How much do replacement filters cost?
It depends on which filters you’re buying, for what type of system, and from which manufacturer.
Let’s start with the cost of cartridge filter replacements:
- Sediment filters cost about $25
- Carbon filters cost about $30
- Post filters cost about $20
Most manufacturers offer packs of filters for a discounted price per filter.
The cost of replacement filter media is:
- About $150 for the media alone
- Up to $350 for a media replacement kit (usually offered by the manufacturer)
Is replacing a whole house water filter difficult?
No. Most people should be able to replace the filters themselves. Even if you hired a professional to install the system, you’ll have no trouble replacing the filters, because you don’t need to remove the entire system from your water line or do anything more complicated than simply untwisting and twisting.
Replacing the media in a tank-based system is more physically challenging, but the process is still easy enough to do yourself.

Do I need to replace the o-ring?
If your filter comes with a new o-ring, then yes, make sure the old o-ring is removed. Otherwise, check the o-ring for damage and replace it if needed. The o-ring might just need to be lubricated with some silicone grease to maintain the seal on the filter connections.
Don’t ever throw out the o-ring if you don’t have a replacement. The o-ring might not look like much, but it’s essential for preventing leaks in the system.
