Scaling, appliance damage, and spots on your glassware are all signs of hard water damage in your home.
Fixing water hardness can save you hundreds of dollars in the long run – but how can you be sure that what you’re dealing with is hard water?
Our water treatment experts have been testing and recommending solutions for hard water for over a decade. Here, we’ve recommended the 5 best methods of testing for hard water.
📌 Key Takeaways:
- You can test for hard water by using a simple soap test, a DIY hardness test kit, or a laboratory test.
- If you discover hard water, you can tackle the issue by installing a water softening system in your home.
Table of Contents
- ▶️ Video Guide
- 🧴Method 1: Simple Soap Test
- 🚰 Method 2: Read Your Water Quality Report
- 📏 Method 3: Hard Water Test Strips
- 🧪 Method 4: Liquid Test Kit
- 🔬 Method 5: Laboratory Test
- 📊 What To Know When Interpreting Your Test Results
- 📌 What To Do If You Have Hard Water: Install A Water Softener
- ❔ Test Water Hardness: FAQ
▶️ Video Guide
🧴Method 1: Simple Soap Test
The soap test is a great way to determine water hardness. It won’t tell you exactly how hard or soft your water is, but it’s a quick and easy indicator of whether or not you have hard water.
You will need:
- A clear plastic bottle with a lid
- Pure liquid soap
- A water sample from your faucet
Follow these steps:
- Fill a plastic bottle two-thirds full of water.
- Add a couple of drops of pure liquid soap to the bottle.
- Close the bottle lid and shake vigorously for about 30 seconds.
Interpreting The Results
The water should change appearance depending on whether or not hardness minerals are present:
- If you have soft water, your water will be clear and topped with a thick layer of white soap bubbles.
- If you have hard water, the water will have a milky, cloudy appearance with a lack of suds on the surface.
🚰 Method 2: Read Your Water Quality Report
Public water systems must all produce annual Water Quality Reports (otherwise called Consumer Confidence Reports) to document the contaminants detected in their treated municipal water supplies.
If you don’t want to pay for a hard water test, you can simply review your latest Water Quality Report for your local water company online.
Interpreting The Results
Your Water Quality Report should list the detected water hardness in a table, usually presented alongside other secondary or unregulated contaminants.
The table should mention the units in which the hardness level has been recorded (e.g. mg/L or PPM) as well as the concentrations detected in the company’s testing.
👨🔬 Tip: If you can’t find a mention of water hardness, your water utility might have listed hardness as “calcium carbonate” in the report instead.
There are a couple of limitations to be aware of:
- The results are a measurement of water hardness usually at the water treatment facility, and don’t account for fluctuating hardness levels.
- Not all Consumer Confidence Reports document water hardness at all.
Here’s an example of a Water Quality report that documents the water hardness levels detected by a water utility in Washington:

📏 Method 3: Hard Water Test Strips
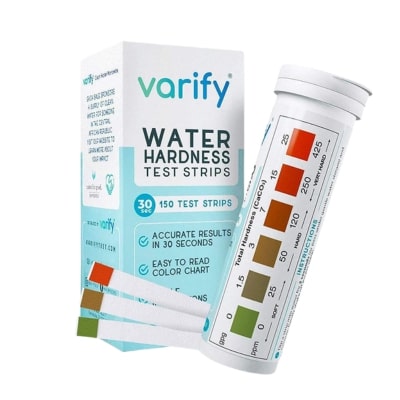
Hard water testing strips offer a quick and easy way to test for hard water at home.
A DIY water hardness test works by changing color to indicate the minerals present in the water. You can compare the color of the strip to the color chart, which will help you to determine your water hardness.
You can buy a hard water test kit online or at your local hardware store for less than $20.

Some water softener companies offer free tests for measuring water hardness. This is a route to consider if you don’t want to pay for your own test!
You will need:
- A sample of your water
- A test strip
Follow these steps:
- Dip the test strip in a sample of cold water from your tap.
- Wait for the strip to change color.
- Compare the color of the strip to the included color chart. This will give you a water hardness reading.
Interpreting The Results
DIY testing with strips and a color chart doesn’t give the most accurate test results to the exact grain-per-gallon of hardness, but it’ll help you to understand your water hardness category (soft, mildly hard, moderately hard, etc.).
To interpret your results, look at the color chart included with your test strips (you can usually find this on the bottle itself).
In a typical DIY water hardness test, there are 6-8 different color shades lined up next to one another. Each shade indicates a different water hardness level, from soft to very hard.
The color chart should have hardness readings that correspond to the different shades. These are typically expressed in grains per gallon (GPG) on the top and parts per million (ppm)/ milligrams per liter mg (MG/L) along the bottom. You can use these results to determine what category of hardness your water falls into.

🧪 Method 4: Liquid Test Kit
A liquid test kit, sometimes referred to as a liquid reagent test, is another kind of at-home water hardness test. Liquid tests aren’t as popular as test kits that use strips.
You will need:
- A water sample
- A liquid test
Follow these steps:
- Collect a small sample of your water (usually around 10 ml).
- Add the buffer solution
- Add the indicator solution
- Add the EDTA drops one by one to the water, waiting between each drop.
- Continue until your water turns blue. This may take a few drops.
Interpreting The Results
The more drops it takes for your water to change color, the harder your water. The test should come with instructions on how to read your results to accurately measure water hardness.
In the test we used, each drop counted for 1 GPG of hardness. So, since it took 7 drops for the water to change color, we had a hardness of 7 GPG.
🔬 Method 5: Laboratory Test
If you have a bit more money to spend on a hard water test, consider paying for a lab test.
Laboratory testing gives the most accurate results. You’ll know your exact hard water reading, in both PPM and GPG. However, lab testing is the most expensive option, and we don’t think it’s essential when testing for impurities that don’t have health effects.
Most laboratory hard water tests cost in the range of $40-$80. You just send a sample of your water to the laboratory and wait 1-2 weeks for the results to be emailed to you.
Interpreting The Results
Your laboratory will probably send you a test report that documents the concentration of hardness minerals detected in your water.
Some testing labs provide detailed additional information, including:
- The aesthetic effects you might notice in your home, based on your water’s magnesium and calcium carbonate levels
- Whether or not you would benefit from a water-softening solution.
A good water testing laboratory should provide customer support to anyone who needs help interpreting their results.

📊 What To Know When Interpreting Your Test Results
To be able to interpret your test results, you need to know how water hardness is measured.
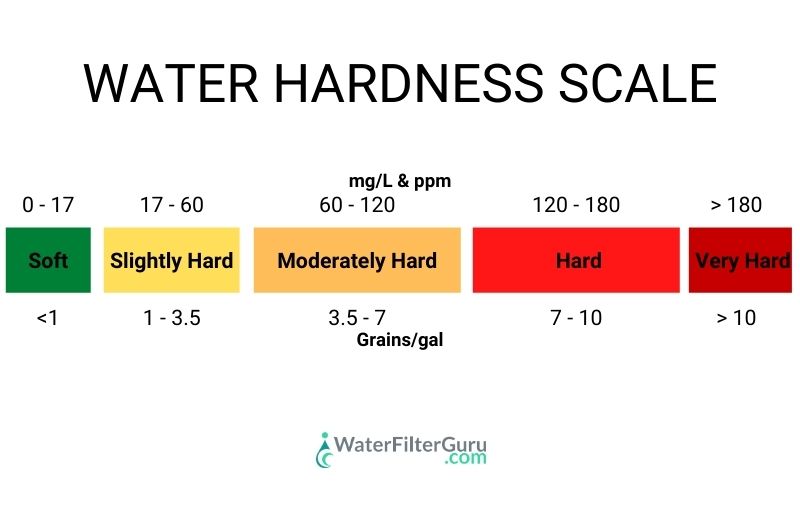
👨🔬 Water hardness is measured in GPG (grains per gallon). You can convert GPG to mg/L (milligrams per liter) or parts per million (PPM) easily.
For example:
- 7 GPG of hardness is equal to 120 PPM.
- Parts per million and milligrams per liter are interchangeable, so 120 PPM = 120 mg/L.
According to the USGS, water hardness falls into 4 categories:
| Hardness Classification | mG/L |
|---|---|
| Soft | 0-60 mg/L (of calcium carbonate) |
| Moderately hard | 61-120 mg/L |
| Hard | 121-180 mg/L |
| Very hard | More than 180 mg/L |

📌 What To Do If You Have Hard Water: Install A Water Softener
So, you’ve tested your water and discovered that its calcium carbonate levels are high. How do you clear these issues in your home?
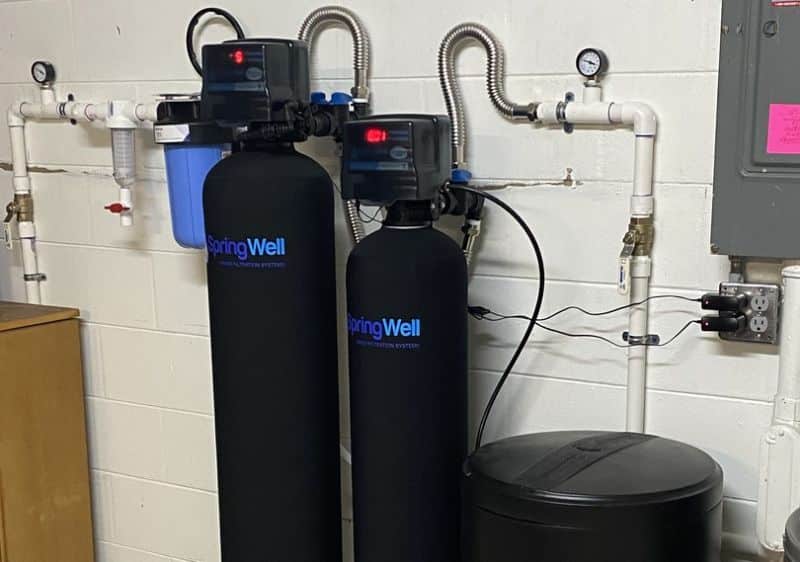
The simplest solution is to install a whole home water softener or conditioner:
- Water softeners are designed to soften water by exchanging magnesium and calcium mineral ions with sodium ions (which can’t form mineral scale).
- Water conditioners retain hard water minerals but crystalize them, preventing them from being able to form scale. A WaterReuse study found that water conditioners can reduce scale by 46-99%, depending on the method of conditioning used.
Water softening systems are an incredibly advantageous water treatment solution for your home.

There are a few key benefits of installing a water softener or conditioner in your home:
- Effective scale prevention. Water softeners prevent scale build-up on your faucets and appliances, including water heaters, showers, and faucets.
- Money-saving. A water softener helps you to save money by improving your appliance efficiency and reducing your soap use.
- Reduce cleaning efforts. Water softeners ensure your sinks, shower walls, and tubs are no longer affected by scale formation, which helps to reduce your cleaning duties.
The only effective way to achieve soft water is with a water softener.
On the hunt for a solution to hard water? Check out these handy guides:
❔ Test Water Hardness: FAQ
How can I measure water hardness at home?
The cheapest and most accurate way to measure water hardness at home is to use hard water test strips, which you can buy online. You can also do a basic water hardness soap test to get an idea of your water hardness.
How do I know if my water is hard or soft?
You can do a soap test to know quickly if your water is hard or soft. Just fill a plastic bottle two-thirds full of water, then add several drops of liquid soap. Close the bottle lid and shake it for about 30 seconds. Soft water should be clear and topped with a thick layer of white soap bubbles, while hard water will have a milky, cloudy appearance with a lack of suds on the surface. Alternatively, simply look for signs of hard water, like limescale around your faucets.
What’s the best way to test water hardness?
The best way to test water hardness depends on your budget and your preferences. The most accurate and comprehensive method is to pay for a laboratory test. However, this is also the most expensive method. If you want to save money, you can test your water hardness with a DIY test kit or with the soap test.

What is a good level of hardness in water?
A good level of hardness in water is anything below 3.5 grains per gallon or 60 parts per million. This indicates that the dissolved minerals content in the water is low, and the water is only slightly hard. You’re less likely to have issues with limescale and other hard water effects if your water’s hardness reading falls below this level.
