Water softeners are a complex piece of equipment that can be difficult to troubleshoot and repair.
You might notice issues with your water pressure, taste, or quality if your water softner needs to be repaired.
In this water softener repair guide, we’ve shared the three easy steps you should take to fix a broken water softener.
📌 Key Takeaways:
- Properly functioning water softeners should provide consistently soft water and regenerate every 12-14 days on average.
- To repair a water softener, clean out the brine tank, then clean the resin injector and resin beads.
- Most minor water softener issues can easily be DIY repaired, but you might need a plumber to fix a more complex issue.
Table of Contents
🚿 How Does A Water Softener Work?
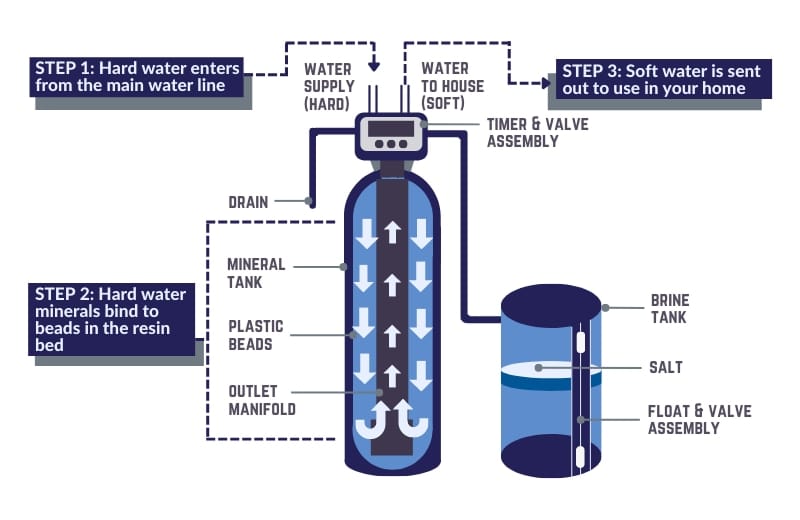
You’ll be better equipped to troubleshoot and repair a water softener if you know how a water softener performs when it’s working properly.
The water softening process goes like this:
- The brine tank fills with water. The salt in the tank dissolves in the water to form a salty water solution called brine.
- The brine flows into the resin tank, and the resin bed is saturated with sodium ions.
- Hard water from your plumbing flows into the resin tank.
- The sodium ions in the resin bed are released into the water in exchange for calcium and magnesium minerals.
- The softening process continues until all the sodium has been depleted from the resin bed.
- The cycle will then start again, and the water softener will regenerate by sending brine solution through the resin.
The water softening process should occur whenever you use water in your home, whether you turn on a faucet or shower, or switch on an appliance.
The regeneration process usually happens every 12 to 14 days on average.

🪛 Water Softener Repair in 3 Steps
Below, we’ve outlined the three steps you should take to repair a water softener.
These steps should resolve most issues of a water softener not working properly. But if they don’t, you can check out our more extensive list of water softener problems and how to fix them.
Step 1: Clean The Brine Tank
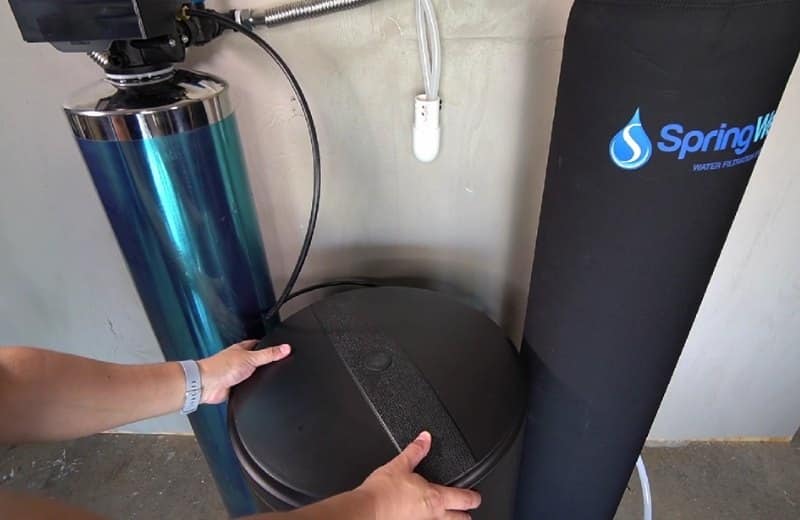
The water softener brine tank, otherwise known as the salt tank, contains the softening salt. Most water softeners have separate brine tanks and resin tanks, while some have an all-in-one design that combines the brine and resin tanks in a single unit.
Some of the most common and easy-to-repair water softener issues take place in the brine tank. You’re most likely to experience brine tank issues if:
- You add too much salt to the tank
- You use impure or dirty salt (like rock salt), or the wrong type of salt
- You let the tank’s salt levels fall too low
To clean the brine tank, follow these steps:
- Lift the lid of the tank and look inside.
- Check for salt bridges. A salt bridge is a crusty layer of compacted salt that forms over a pocket of air above the remaining salt.
- If you notice a salt bridge, get rid of it by breaking it up with a broom handle, then scoop the broken-up salt out of the brine tank with a net.
- Dispose of the salt and drain the tank (or use a bucket or a wet vac to suck out the water if you don’t have a drain valve).
- Clean out the empty tank with water and soap, then rinse it out and let it air dry.
- Add a fresh layer of salt to the optimal salt level in the tank.
💡 You can reduce the likelihood of issues in your brine tank by maintaining a good amount of salt, using pure salt, and cleaning out the brine tank once every 6-12 months to prevent dirt and debris from building up inside.

Step 2: Clean The Resin Tank Injector
Another common cause of problems in a water softener system is the resin tank injector.
The resin tank injector is a venturi device that allows brine to be drawn from the brine tank into the resin tank. Over time, this injector may become clogged with sediment, especially if you use low-purity salt. This may prevent the device from drawing enough brine into the resin.
To clean the resin injector, follow these steps:
- Shut off the water supply to the softener by engaging the bypass valve. Check the user manual if you’re not sure where your bypass valve is located.
- Program a manual regeneration cycle to relieve pressure inside the softener tanks.
- Unscrew the caps on each side of the water softener head.
- You should find the injector screen on the left side of the head and the injector on the right side. Thoroughly clean out both of these parts.
💡 You can reduce the likelihood of blockages in the resin injector by using pure salt in the salt tank. This will greatly reduce the sediment and debris that gets into the softening system.
Step 3: Clean The Resin Beads
Finally, you might have issues with soft water production in your water softener due to iron, chlorine, or sediment damage in the resin beads.
To clean out the resin beads, follow these steps:
- Buy a commercial resin bed cleaner, like Iron Out, that’s safe to use in water softeners.
- Follow the manufacturer’s instructions to dilute the cleaner and add it to the brine tank.
- Set your water softener to perform a manual regeneration cycle.
Even if you don’t notice an issue with resin damage, you should clean the resin bed at least once a year to keep it clean and extend its lifespan. Make resin cleaning one of your regular maintenance tasks to keep your water softener in good working order.
📌 Note: the softener resin only lasts 10-20 years (depending on whether the resin is 8% or 10% crosslink). If the resin is too badly damaged or worn, you might need to buy a resin replacement rather than using a cleaner.
🆚 DIY Vs Professional Water Softener Repairs
The water softener repairs listed above can all be done by a non-professional, as long as you have the basic required tools and some plumbing knowledge.
But if you’re dealing with a more difficult problem, or you just don’t want to make the repairs yourself, you can hire a plumber to do the job for you.
Most plumbers cost $45-$110 per hour, and repairs take 1-3 hours on average, depending on the problem.

❔ FAQ
What are the signs that a water softener isn’t working?
Signs that a water softener isn’t working include salty-tasting water, the reappearance of hard water scale, unusual noises or constant flushing water in your water softener, water that doesn’t feel soft, and changes to your home’s water pressure. The signs you might notice depend on the cause of the problem.
How much does it cost to repair a water softener?
The cost of repairing a water softener system is $0-$350, depending on factors including the complexity of the problem, whether replacement parts are required, and whether you DIY repair the water softener or hire a plumber to repair it for you.
Is it worth fixing old water softener?
Fixing an old water softener is worth it if the softener is less than 10-15 years old and has one or two minor problems and is otherwise in good condition. If the problems are big or expensive to replace, however, you should spend your money more wisely on a new, efficient water softener that will last you years longer than your old, damaged, likely inefficient water softener.
