An inline water filter is a type of filter installed along a water line leading to a specific point of use appliance, such as a refrigerator, a water dispenser, an ice maker, or a water cooler.
In this short guide, we’ve shared the step-by-step process of replacing an inline water filter.
📌 Key Takeaways:
- To change an inline water filter, shut off your water supply, prime the filter (if necessary), then swap out the old filter for the new filter.
- Make sure you install the inlet and outlet ends of the filter on the right sides for the correct flow direction.
- Replacing an inline water filter is essential to enjoy continued filtered water at home.
Table of Contents
📖 How to Change Inline Water Filter: Step-By-Step
To change an inline filter, follow these steps:
Step 1: Shut Off Your Water
To begin, unpackage your new filter, double-checking now that it’s the right type of filter for your existing filter housing.
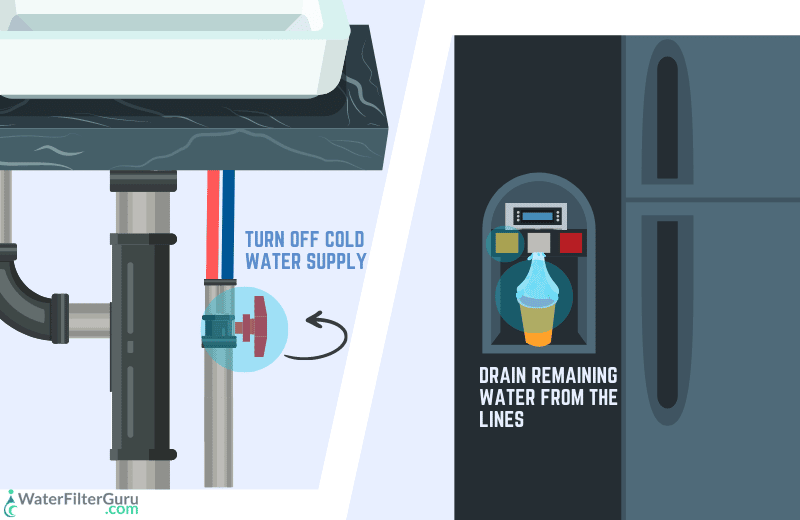
Next, shut off your under-sink water supply. You should find the shutoff valve underneath your kitchen sink. Turn the valve to stop the flow of water into the filter.
Then, press your water dispenser button (if you’re inline appliance has one) to drain the remaining water and relieve pressure from the pipe.
If you can’t find an under-sink shutoff valve, turn off the main water supply valve to your home.
Your filter probably won’t need priming, but check your user manual and follow priming instructions if it does.
Step 2: Identify The Direction Of Flow
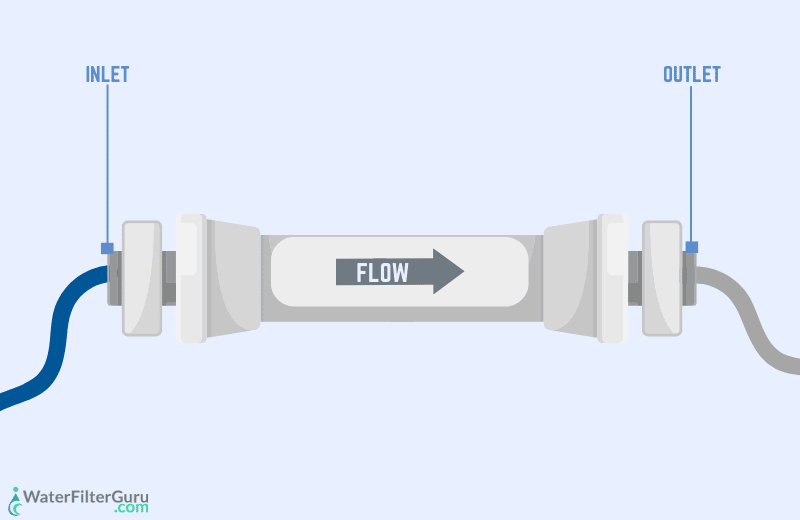
Before you install your new filter, you need to be sure that the filter is pointed the right way.
Inline water filters have an inlet end and an outlet end. The inlet is usually thicker than the outlet.
Check the outside of the filter cartridge, which should be marked with arrows telling you which way to install the filter for the correct direction of water flow.
Step 3: Connect The Filter
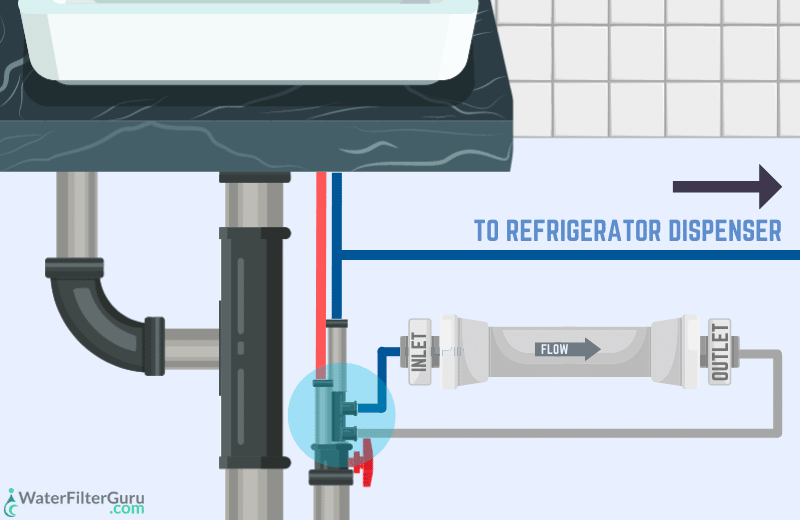
Usually, you can connect an inline filter to your water pipe with quick-connect fittings. Push the tubing into each end of the filter until each side is locked in place.
If you’re installing the filter in a system that uses threaded fittings, screw the filter into the water filter housing, ready for use.
Step 4: Turn On Water & Flush The Filter
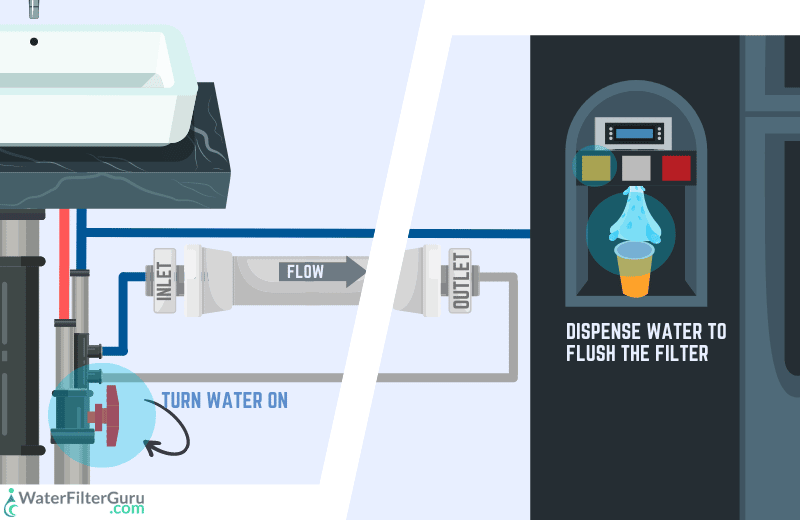
Now the new filter is replaced, switch on your water and check the cartridge for leaks. Press the water dispenser button to flush water through the filter. Most inline filters need to be flushed for about 10 minutes to remove carbon particles and release trapped air.
And that’s it – you’re now ready to use the inline filter for its intended purpose.
💡 We recommend writing the date on your new filter, or marking the date in your calendar, so you know exactly when you need to replace it.
Video Instructions
🤔 Why Should You Replace An Inline Water Filter?
Like all types of water filters, inline water filters only work for so long before they need to be replaced.
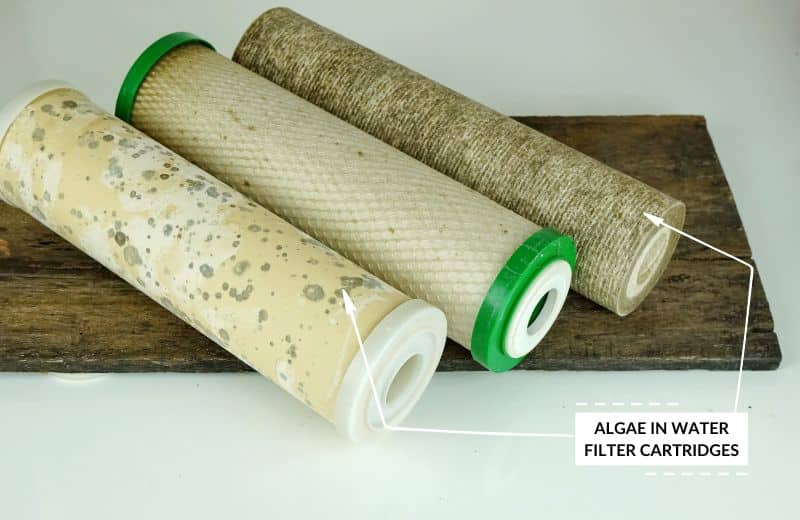
Over time, a water filter accumulates contaminants on the surface of the media. Eventually, all the media in the water filter cartridge will be clogged, preventing water from passing through.
If you don’t replace an inline water filter, you risk:
- Getting sick from bacteria buildup in the filter media
- Drinking contaminants that have leached back into your water supply due to degradation of the filter media
- Ruining your water’s taste with contaminants that would usually be removed by a working filter
- Reducing your water flow rate or pressure and affecting the performance of your fridge water dispenser or other appliances
Replacing your filters on time will ensure your water quality is always exceptional, without a drop in your water pressure or flow rate.
❔ How to Change Inline Water Filter: FAQ
How often should you change an inline water filter?
You should aim to change an inline water filter every 3-6 months, depending on the size and surface area of the filter, your water usage and quality, and the complexity of the filter media. If you use more water than average or your water is more contaminated than normal, you’ll probably need to replace your filter more frequently.
What are some signs that you need to replace an inline filter?
Signs that you need a new inline filter cartridge are a reduced water flow rate, poor-tasting water, or changes to your water’s appearance or smell. If something seems off and it’s been a while since you last changed the filter, buy a replacement. Inline filters don’t have a filter change light, so you should make a note of when to replace the filter if you think you’ll forget.
How long do inline RV water filters last?
An inline RV water filter lasts three to four months on average, depending on the exact size, surface area, and design of the filter. Check your user manual or contact the manufacturer to learn how long your RV inline filter should last.
Can you change water filter without turning off water?
No, in most cases, you should shut off your water supply to change an inline filter. This will prevent leaks at the filter change site, making the job quicker and easier for you. You don’t have to switch off your main water supply, though – just close the under-sink valve to shut off the point-of-use water supply that leads to the filter.
